Acquire Point Cloud and Image Data from Multiple Camera Components
R2026bThis example shows how to acquire point cloud data, confidence maps, and intensity images from a Basler ToF blaze-101 camera using Image Acquisition Toolbox™. The camera provides multiple data components (Range, Intensity, and Confidence) that can be acquired simultaneously.
Requirements
This example requires the following add-ons:
Image Acquisition Toolbox
Image Acquisition Toolbox Support Package for GenICam™ Interface
Connect to the Camera
Use imaqhwinfo to discover all devices available through the GenTL adaptor. This is useful when multiple cameras are connected and you need to identify the correct device index.
hwlist = imaqhwinfo("gentl")hwlist = struct with fields:
AdaptorDllName: 'Z:\77\user.3DSimpleExample\runnable\matlab\toolbox\imaq\supportpackages\gentl\adaptor\win64\mwgentlimaq.dll'
AdaptorDllVersion: '26.2 (R2026b)'
AdaptorName: 'gentl'
DeviceIDs: {[1]}
DeviceInfo: [1×1 struct]
hwlist.DeviceInfo
ans = struct with fields:
             DefaultFormat: 'Mono16'
       DeviceFileSupported: 0
                DeviceName: 'blz1'
                  DeviceID: 1
     VideoInputConstructor: 'videoinput('gentl', 1)'
    VideoDeviceConstructor: 'imaq.VideoDevice('gentl', 1)'
          SupportedFormats: {'Confidence16'  'Coord3D_ABC32f'  'Coord3D_C16'  'Mono16'}
Create a videoinput object for the first GenTL device. Then retrieve the video source object, which provides access to camera-specific properties such as component selection, pixel format, and depth settings.
vid = videoinput("gentl", 1);
src = getselectedsource(vid);
Enable Multiple Components
The Basler Blaze camera exposes multiple data components through the GenICam interface. To acquire 3D point cloud data and per-pixel confidence values alongside intensity, you must explicitly enable each component. Use the ComponentSelector property to select a component, then set ComponentEnable to "True" to activate it.
src.ComponentSelector = "Intensity";
src.ComponentEnable = "True";
src.ComponentSelector = "Range";
src.ComponentEnable = "True";
src.ComponentSelector = "Confidence";
src.ComponentEnable = "True";
Set Pixel Format for Confidence
The Confidence component supports multiple pixel formats. Set it to Mono16 to get 16-bit unsigned integer confidence values, providing finer granularity than 8-bit formats. Note that the PixelFormat property applies to whichever component is currently selected via ComponentSelector. E.g. in this case, as Confidence was the last component selected as src.ComponentSelector = "Confidence", you can set the pixel format for Confidence as follows:
src.PixelFormat = "Mono16";Verify Component Configuration
Call componentInfo again to confirm that all three components (Range, Intensity, and Confidence) are now enabled with the expected pixel formats. This verification step ensures your configuration is correct before starting the acquisition.
cInfo = componentInfo(src)
cInfo = 3×4 table
     Component      Enabled    SelectedPixelFormat                  AvailablePixelFormats
    ____________    _______    ___________________    _________________________________________________

    "Intensity"     "True"      "Mono16"              {["Mono16"                                     ]}
    "Range"         "True"      "Coord3D_ABC32f"      {["Mono16"    "Coord3D_C16"    "Coord3D_ABC32f"]}
    "Confidence"    "True"      "Mono16"              {["Mono16"    "Confidence16"                   ]}

	Get insights using Copilot
Preview All Enabled Components
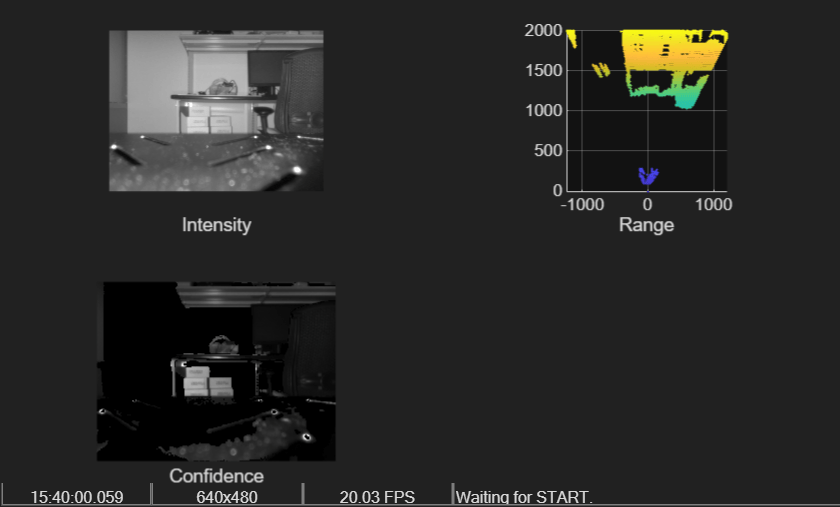
Use preview to open a live preview window that shows data from all enabled components simultaneously. The preview window displays Range, Confidence, and Intensity side by side, allowing you to visually confirm the camera is working and positioned correctly before acquiring data.
preview(vid)
Close Preview
Close existing preview window.
closepreview(vid)
Preview Selected Components
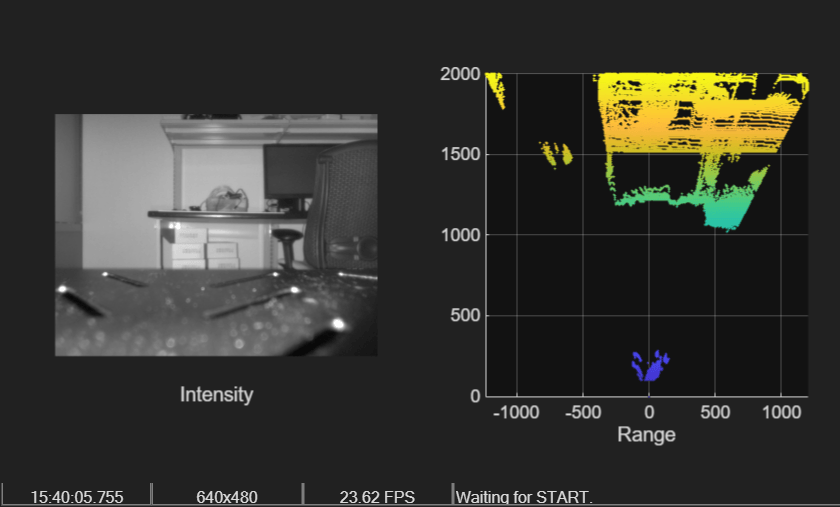
If you only want to see a subset of the enabled components, pass the "Components" name-value argument with an array of component names as a string array. This is useful when you want to focus on specific data streams without disabling the others.
preview(vid, "Components", ["Range", "Intensity"])
Acquire Data
Set the FramesPerTrigger property to specify the number of frames to capture. Then call start to begin the acquisition and wait to block MATLAB® until all requested frames are acquired. The FramesPerTrigger property controls the total number of frames captured per trigger event.
vid.FramesPerTrigger = 10;
start(vid);
wait(vid);
Verify the number of frames successfully acquired by the camera.
vid.FramesAcquired
ans =
10
Retrieve Point Cloud, Confidence, and Intensity Data
Use getdata to transfer the acquired frames from the video input buffer into the MATLAB workspace. When multiple components are enabled, getdata returns a struct with one field per component. Each field contains a 4-D array:
Range: 480x640x3x10 single — XYZ point cloud coordinates (Height x Width x 3 channels x 10 Frames)
Intensity: 480x640x1x10 uint16 — grayscale intensity image (Height x Width x 1 channel x 10 Frames)
Confidence: 480x640x1x10 uint16 — per-pixel confidence values (Height x Width x 1 channel x 10 Frames)
data = getdata(vid)
data = struct with fields:
         Range: [480×640×3×10 single]
     Intensity: [480×640×1×10 uint16]
    Confidence: [480×640×1×10 uint16]
Inspect the dimensions of each component to confirm the expected sizes. The Range component has 3 channels (X, Y, Z), while Intensity and Confidence each have a single channel.
size(data.Range)
ans = 1×4

    480    640    3    10
size(data.Intensity)
ans = 1×4

    480    640    1    10
size(data.Confidence)
ans = 1×4

    480    640    1    10
Visualize Acquired Data
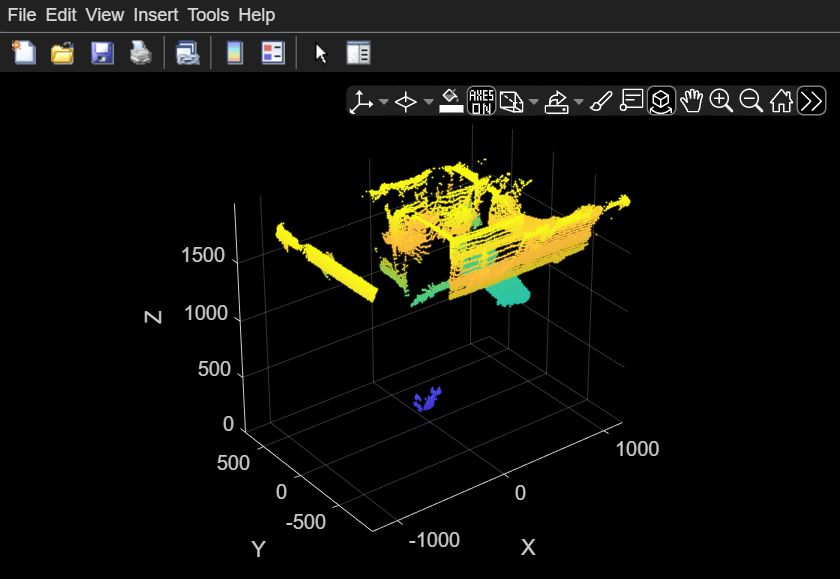
Display the first frame from each component. The Range data is visualized as an interactive 3D point cloud using pcplayer, while Intensity and Confidence are displayed as 2-D grayscale images.
Point Cloud from Range
Create a pointCloud object from the first frame of Range data and display it using pcplayer. The player requires axis limits, which are derived from the point cloud extents.
ptCloud = pointCloud(data.Range(:,:,:,1));
player = pcplayer(ptCloud.XLimits, ptCloud.YLimits, ptCloud.ZLimits);
view(player, ptCloud);
Intensity Image
Display the first Intensity frame as a grayscale image. The Intensity component captures the amount of reflected light, similar to a conventional 2-D camera image. The imshow [ ] argument scales the display based on the range of pixel values.
imshow(data.Intensity(:,:,1,1), [])
title("Intensity Image")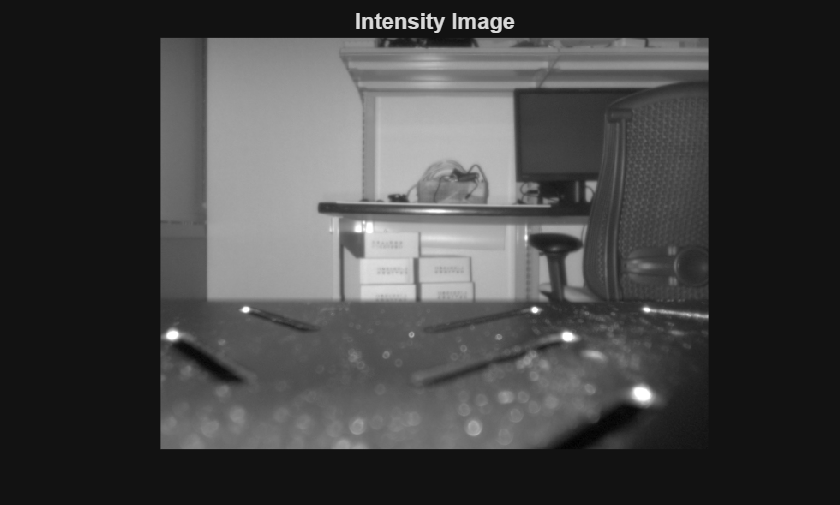
Confidence Map
Display the first Confidence frame. The Confidence component provides a per-pixel quality measure indicating how reliable the depth measurement is at each pixel. Higher values indicate more trustworthy depth readings.
imshow(data.Confidence(:,:,1,1), [])
title("Confidence Map")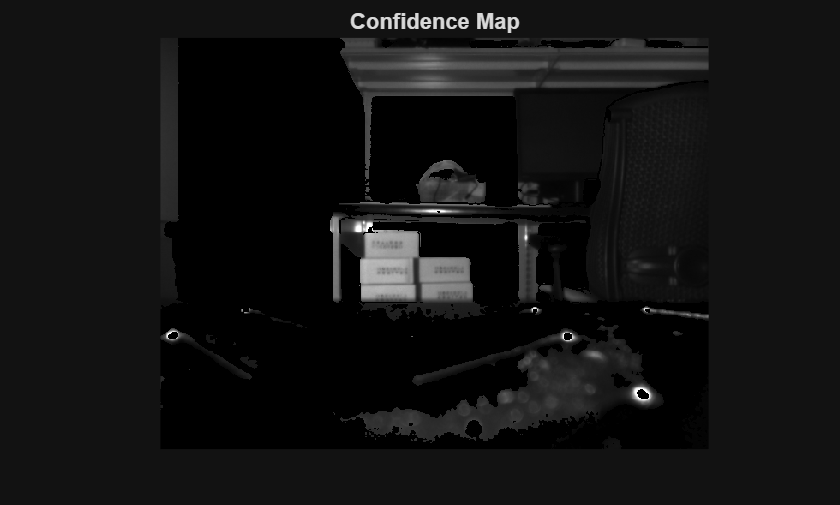
Clean Up
Stop the videoinput object, delete it from memory, and clear the workspace variables. Always clean up video input objects when you are done to release the camera hardware for other applications.
stop(vid);
delete(vid);
clear vid src

