Create Project for a Labeling Team and Publish Tasks
The Image Labeler app enables you to collaborate with a team to label large image data sets by distributing label tasks among the team members. The team member responsible for the project setup, and for tracking the progress of the label project, is known as the Project Owner. The team members responsible for completing tasks assigned to them are Task Owners.
This example walks you through the steps that a project owner must follow to set up a project, create label definitions, assign images to tasks, and distribute them among the labeling team members. Those labeling team members are task owners who must then work on completing their label tasks.
Load Image Data and Create Label Definitions
Open the Image Labeler app by entering this command. Alternatively, you can open the app from the Apps tab of the MATLAB® toolstrip, under Image Processing and Computer Vision.
imageLabeler
Load Image Data
Load a set of image files directly into the app.
On the app toolstrip, click Import > From File. The Open Images dialog box opens.
In the File Name parameter, specify this folder.
<matlabroot>is the full path to your MATLAB installation folder, as returned by thematlabrootfunction.<matlabroot>\toolbox\vision\visiondata\NewTsukuba
Select all 150 images in the folder using Ctrl + A. Click Open to load all the images into the app session under the Image Browser tab.
Alternatively, if you have an existing
imageDatastoreobject in the workspace that links to a collection of images, you can load that data by selecting Import > From Workspace.
Create Label Definitions
Label definitions contain information about the labels that the label task owners must mark on the images. In this example, you interactively add a few label definitions for the labeling team members to work with. You can add any type of label definition by selecting options from the Add Label drop-down on the app toolstrip.
Add a rectangle label definition to indicate the location of the lamp in each image. On the app toolstrip, select Add Label > Rectangle. A Define New Rectangle Label dialog box opens. For the Label Name parameter, enter
Lamp.Using the same procedure, add another rectangle label definition to indicate the location of the video camera in each image. In the Label Name parameter, enter
VideoCamera.Add a scene label indicating the presence of the bust in the frame. On the app toolstrip, select Label > Scene. A Define New Scene Label dialog box opens. For the Label Name parameter, enter
BustPresent.
For more information about the different types of label definitions, see Create Label Definitions.
Alternatively, if you already have label definitions created and stored in the workspace, you can import them by selecting Import > Label Definitions.
Create Label Tasks and Assign to Task Owners
To distribute the labeling work among different team members, you must create one or more label tasks, add images to each task, and then assign them to the individual labeling team members. You can use one of these options:
Create label tasks manually, one at a time, and assign images to each task.
Create multiple label tasks at once, and auto-distribute image assignment.
Create Label Tasks and Manually Assign Images
On the app toolstrip, select Add Label Task(s) > Add Single Label Task.
In Task Information pane, for the Name parameter, enter
Task 1.For the Instruction parameter, enter
Label all images with ROI and Scene labels.Add the first 50 images in the data set to this task using these steps:
Select the first image in the Image Browser.
Then, in the Task Information pane, for the Select Images parameter, enter 50 and press Enter. This selects a total of 50 images sequentially, starting from the initial image selected. All selected images appear highlighted in blue background in the Image Browser.
Click Add Images To List to add the selected images to the task. Once added, the image names show up as entries in the Images List. Also, in the Image Browser, the thumbnails for the added images will have a blue image status legend in the top right corner, indicating that they are associated with a label task.
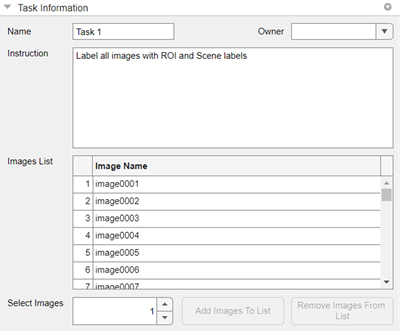
Alternatively, you can add images to the task by manually selecting them in the Image Browser while holding Ctrl. Also, note that you cannot distribute different label definitions to different tasks. All tasks inherit all label definitions.
Repeat steps 1–4 to create a new task named
Task 2, and add the next 50 images to it. You must select the 51st image in the step 4a. It is the first image in Image Browser without the blue legend entry in the top right corner.Repeat steps 1–4 to create a new task named
Task 3, and add the next 50 images to it. You must select the 101st image in the step 4a. It is the first image in Image Browser without the blue legend entry in the top right corner.
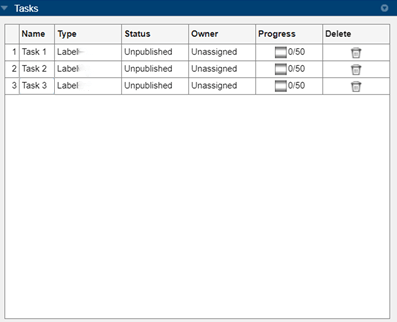
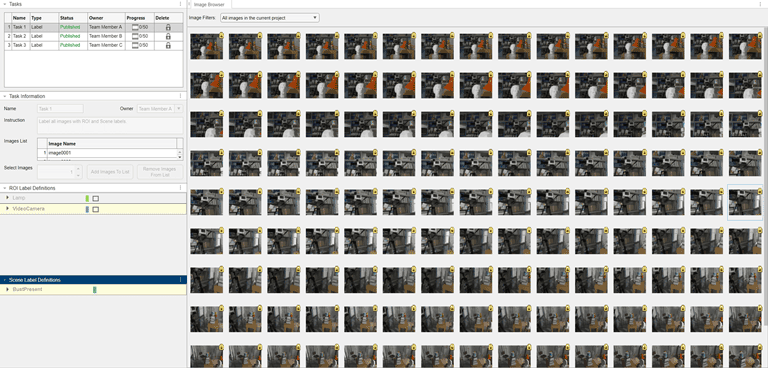
The Tasks pane now lists all three tasks.
Create Multiple Label Tasks and Auto Distribute Image Assignment
On the app toolstrip, select Add Label Task(s) > Add Multiple Label Tasks and Auto Distribute Images.
This opens the Add Label Tasks dialog box. Specify Number of Label Task(s) as 3 and Images to be distributed as 150 to auto distribute 150 images to 3 tasks, assigning 50 images to each task.
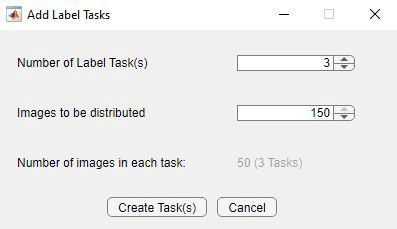
Click Create Task(s). The Tasks pane now lists all three tasks with the default task names
Untitled_1,Untitled_2, andUntitled_3.In the Tasks pane, select the task with the name
Untitled_1. Then, in the Task Information pane, set the Name parameter toTask 1. For the Instruction parameter, addLabel all images with ROI and Scene labels, and press Enter.Use the same process to modify the tasks
Untitled_2andUntitled_3changing their names toTask 2andTask 3, respectively
Assign Label Tasks to Task Owners
To add the names of individual label task owners in your team, on the app toolstrip, select Add Team Members. This opens the Add Team Members dialog box. For this example, add three team members:
Team Member A,Team Member B, andTeam Member C.In the Tasks pane, click
Task
                                1
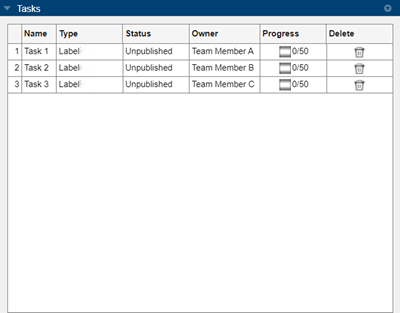
. Then, in the Task Information pane, set the Owner toTeam Member Ato assign the task to them.Use the same process to assign
Task 2andTask 3toTeam Member BandTeam Member C, respectively.Alternatively, for each task, you can enter the names of task owners directly in the Owner column in the Task Information pane.
Publish Label Tasks and Share Project with Task Owners
Publishing the tasks saves the project in a state that enables individual label task owners to open the project and start working on their assigned label tasks.
For this example, publish all the unpublished tasks at once. To do so, on the app toolstrip, select Publish Tasks > All Unpublished Tasks. In the Image Browser, the thumbnails for all images associated with published tasks will now have a yellow image status legend entry in the top right corner.
Alternatively, to publish a single task, select the desired task in the Tasks pane. Then, on the app toolstrip, select Publish Tasks > Selected Task.
This opens a dialog box with a shareable link to the project location. Share the link with the task owners so that they can start working on their label tasks. When you save the project, ensure that you do so in a location for which the task owners have read/write permissions. You can access the shareable link from the toolstrip by selecting Publish Tasks > Share Instructions.
Note
Distribute the shareable link to the task owners through email, or as a message outside the Image Labeler app.
Under the Visualization tab of the toolstrip, you can modify the app layout and control the appearance of the image status legend on all images (on hover, always displayed, or never).
Create Executable for Label Task Owners Without Full MATLAB License
For label task owners who do not have access to a full MATLAB license, you can create a compiled version of the labeling project in the form of a standalone executable using these steps:
On the Image Labeler tab of the app toolstrip, click Compile.
Choose the app options for compilation based on the task. For this example, set App Type to Label as you are creating this executable for label task owners.
Specify the App Name, Location and include any automation algorithms necessary for labeling.
Click Start Packaging. This creates an executable that you can share with the label task owners.
Review task owners can use the executable to install the standalone app, open the app, and then complete the label tasks.
Modify Published Tasks
Note
After all tasks are in the published state, you cannot make any of these modifications to the tasks:
Delete tasks
Add or remove label definitions
Add new images or remove current images associated with the tasks
Change owners for the individual tasks
To modify the published tasks, you must follow these steps:
Open the saved project in Project Owner mode.
On the app toolstrip, select Unpublish Tasks and either unpublish a single task or all tasks. Ensure that the respective task owners know that you are making modifications so that they do not work on tasks while you modify them.
Edit the tasks as desired.
Republish the tasks.