Create Project and Add Source Files in Polyspace Platform User Interface
The Polyspace Platform user interface allows you to author functional tests for C/C++ code, or check C/C++ code for bugs or run-time errors using static code analysis. Before you begin test authoring or code analysis, you must add your source code to a project.
You can specify your source code manually or extract source code information from a build command after executing the command. If you use a build command or compilation database for building your source code or you build your source code in an IDE (using an underlying build command), try creating a project from the build command first. For more information, see Add Sources from Build Command. If project creation from build command fails, manually add your code.
The Polyspace® Platform user interface saves your project as a .psprjx file. When you add source files to your project, Polyspace saves the paths to your source files relative to the project location.
If you are trying to migrate a project created in the older Polyspace user interface from a .psprj format to a .psprjx format, see Import Projects into Polyspace Platform User Interface.
Add Sources from Build Command
If you use a build command such as make or cmake for building your source code or you are able to generate a JSON compilation database using your build system, you can create a Polyspace Platform project from the build command or compilation database.
For more information on creating a Polyspace Platform project from a build command or compilation database:
At the command line, see Configure Sources and Build Options in Project for Polyspace Analysis and Testing.
In the Polyspace Platform user interface, see Create Polyspace Platform Project From Build Command in User Interface.
Add Sources Manually
You can create an empty project and add source files to it manually.
Select the option New > Project in the toolstrip.
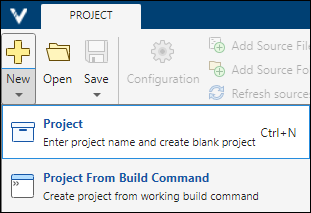
Name your project and select a save location. This creates a
.psprjxfile in the location you specified.You can add individual files or folders to a project. For your convenience, make sure that your sources and tests are in separate folders. Otherwise, when you add sources by folder, you might inadvertently add tests as sources leading to later problems during project build or static analysis.
To add files to a project, select the project in the Projects pane and click the Add Source File button in the toolstrip. Alternatively, right-click the Code node of a project and select Add Source File. In the explorer window, select files to add to the project.
You can also select several files to add at once. In Windows®, select multiple files using Ctrl+click or select a range of files by using Shift+click.
You can also remove files that you added previously. To remove a file, right-click the file and select Remove From Project. Note that you can remove only those files that were explicitly added to the project and not added by adding their parent folder. To see all explicitly added files, locate the Project tab in the Configuration pane and see the option Application source files.
To add folders to a project, select the project in the Projects pane and click the Add Source Folder button in the toolstrip.
You can also remove folders that you added previously. To remove a folder, right-click the folder name on the project and select Remove Folder. Note that you can remove only those folders that were explicitly added to the project. To see all explicitly added folders, locate the Project tab in the Configuration pane and see the section Application source folders.
To add folders containing include files to a project, double-click the Configuration node of the project. On the Project tab, specify the include folder paths for the option Include paths.
If you want to exclude certain files permanently from your project, instead of removing the files, exclude them from the project. Excluding a file ensures that someone else cannot accidentally re-add the file by refreshing the parent folder. To exclude a file (or folder) from a project, right-click the file (or folder) on the Projects pane and select Exclude File (or Exclude Folder). Excluded files and folders appear with the
 icon next to them. To reinclude an excluded file or folder, right-click the file or folder and select Re-include File.
You can see all folders and files explicitly added to the project on the Project tab in the Configuration pane. On the Project tab, besides seeing the files and folders added, you can:
Add more files or folders, or remove previously added files or folders.
For more information, see
Application source foldersorApplication source files.Include C/C++ files with nonstandard extensions in your project.
For more information, see
Include file name patterns.Exclude files specifically for static analysis or testing.
For more information, see
Exclude patterns.Define project variables to use as shorthands when defining paths.
For more information, see
Project variables.
For information on how to keep this project updated, see Update Projects in Polyspace Platform User Interface.
See Also
Application source folders | Application source files | Include file name patterns | Exclude patterns | Project variables | polyspace-configure