Actors in RoadRunner Scenario
In RoadRunner Scenario, an actor is an object within a scenario that interacts with scenario logic. All actor assets included with RoadRunner Scenario consist of models that influence scenario logic or contain scenario logic and perform assigned scenario behaviors. Some actors, such as vehicles and pedestrians, also have animations that play during simulation, such as spinning wheels or a walk cycle. You can design scenario behaviors using paths, waypoints, and anchors you create in the scene, as well as action phases and conditions that you create in the Logic editor. You can also adjust actor behavior based on the behavior of other actors, or import custom behavior and other user-defined assets to further refine actor logic. If you do not manually assign behavior to actors, they behave according to the default logic assigned by RoadRunner Scenario. However, not all actor types have default logic. To learn more about logic in RoadRunner Scenario, see Define Scenario Logic.
You can place actors only when Scenario Editing mode is active, unlike prop models, which are static meshes you place in a RoadRunner scene in Scene Editing mode. Both scenes and scenarios use the 3D canvas in RoadRunner. For more information on the difference between scenes and scenarios, see Switch Between Scene and Scenario Editing.
RoadRunner scenarios can contain these actor types:
Vehicles
Pedestrians
Movable Objects
Traffic Signals

Vehicle Actors
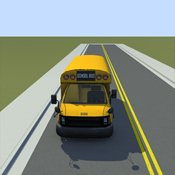
Vehicle actors are assets with the Default Type of Vehicle. When placed in a scene, vehicle actors automatically snap to a lane of a road and face the direction of that lane.
Default Vehicle Logic
When a vehicle actor is placed on a road, RoadRunner Scenario automatically assigns default actor logic in the form of an initial
phase in the Logic editor. This initial phase is an
Initialize Speed action phase that instructs the vehicle
actor to follow the direction of its current lane at a constant speed during
simulation. By default, this initial phase has an end condition of 60 seconds and a
fail condition for any collision between two actors.

You can create more complex vehicle behavior for a scenario by adding and adjusting action phases and conditions in the Logic editor. To learn more about vehicle behaviors, actions, conditions, and defining scenario logic, see Built-In Behavior for Vehicles and Define Scenario Logic.
Vehicle Assets
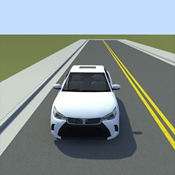
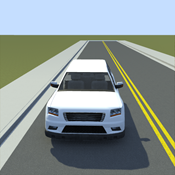
RoadRunner Scenario provides a default vehicle asset, Sedan, you can
access by navigating to the Asset folder in the RoadRunner
Library Browser, then navigating to the
Vehicles subfolder.
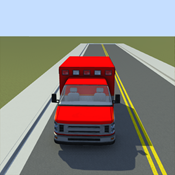
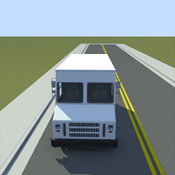
The RoadRunner Asset Library is an add-on product that contains a collection of additional RoadRunner Scenario vehicle assets. This table lists the names and icons of the vehicle assets in the RoadRunner Asset Library. For more details, see RoadRunner Asset Library Add-On.
Additional Vehicle Actor Assets in RoadRunner Asset Library Add-On
|
|
|
|
|
|
|
|
|
Ambulance | Backhoe | CementTruck | CompactCar | DeliveryVan | GarbageTruck | PickupTruck | SchoolBus |
|
|
|
|
|
|
|
| |
SemiTruck | SemiTruck_Trailer01 | SemiTruck_Trailer02 | SemiTruck_Trailer03 | SemiTruck_Trailer04 | Suv | UtilityTruck |


You can also create your own custom vehicle meshes to use in RoadRunner Scenario. To learn how to import custom vehicle meshes, see Import Custom Vehicle Meshes.
Vehicle Attributes
The Attributes pane for each vehicle actor contains several attributes you can adjust to customize the actor. Select a vehicle actor in the Library Browser to view and adjust these attributes:
OpenSCENARIO Category
Mass
Max Speed
Max Acceleration
Max Deceleration
Max Steering Angle
Default Color

Note
The vehicle actor attributes OpenSCENARIO Category, Mass, Max Speed, Max Acceleration, Max Deceleration, Max Steering Angle, and Default Color do not affect the simulation, but RoadRunner Scenario stores and saves the asset values within the RoadRunner project and within exported scenarios containing vehicle actors.
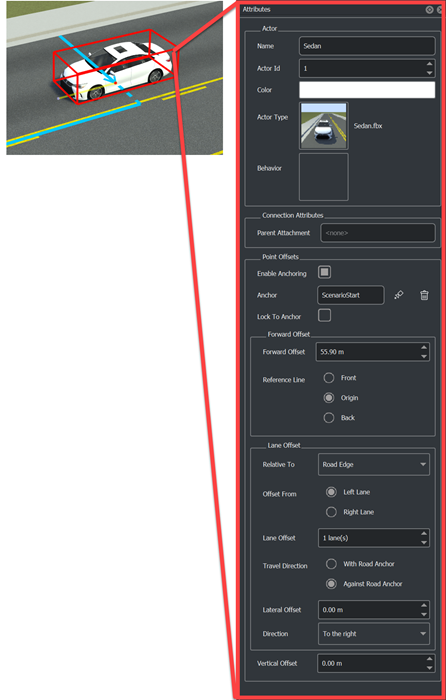
Select a vehicle actor in the scenario to view and adjust these attributes:
Name
Actor Id
Color
Actor Type
Behavior
Parent Attachment
Enable Anchoring
Anchor
Lock To Anchor
Forward Offset
Reference Line
Relative To
Offset From
Lane Offset
Travel Direction
Lateral Offset
Direction
Vertical Offset
You can change the color for most vehicle actors. However, some actors, such as
the Ambulance or GarbageTruck, contain a
predefined Default Color and do not visually reflect any color
selected in the Default Color or Color
field of the Attributes pane in RoadRunner. To learn more about vehicle assets and their attributes, see Vehicle Assets.
Ego, Lead, and Reference Vehicles
Ego, lead, and reference refer to vehicles in a scenario based on their behavior.
Ego vehicle – Refers to vehicle actors that contain sensors that perceive the environment around the vehicle. Ego vehicles typically have custom behavior (such as behavior created with CARLA) that affects how they respond to their environment.
Lead vehicle – Refers to a vehicle traveling in front of, and in the same lane as, the ego vehicle.
Reference vehicle – Refers to a vehicle actor by which other actors in the scenario define their behavior. Other actors can reference the behavior, position, and other attributes of a reference vehicle.
Pedestrian Actors
Pedestrian actors have a Default Type of
Character and a Category of
Pedestrian in the Attributes pane.
Pedestrian actors are similar to vehicle actors in that they perform actions in a
scenario. However, they have different path-following behavior, and do not automatically
snap to, or follow, roads. You must manually define their routing by creating paths or
trajectories. To learn more about paths, see Path Editing.
Default Pedestrian Logic
Like vehicle actors, pedestrian actors follow logic defined in the
Logic editor during scenario simulation. When placed in a
scene, pedestrian actors also have a default initial phase, an end condition of 60
seconds, and a fail condition for any collision between two actors. However, you
must also specify a path or trajectory for them to follow. If you attempt to
simulate a scenario containing a pedestrian actor without an assigned path or
trajectory, the simulation fails and returns this error in the
Output pane: The character actor Actor
Citizen_Male must have a path.
Pedestrian Assets
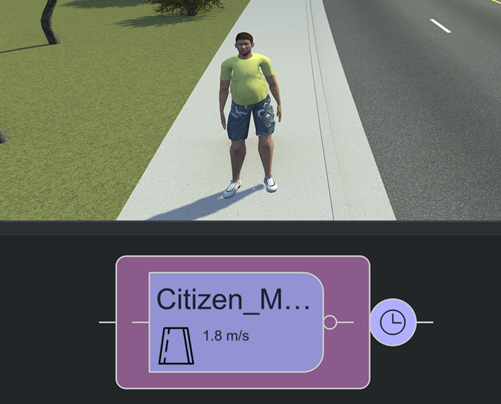
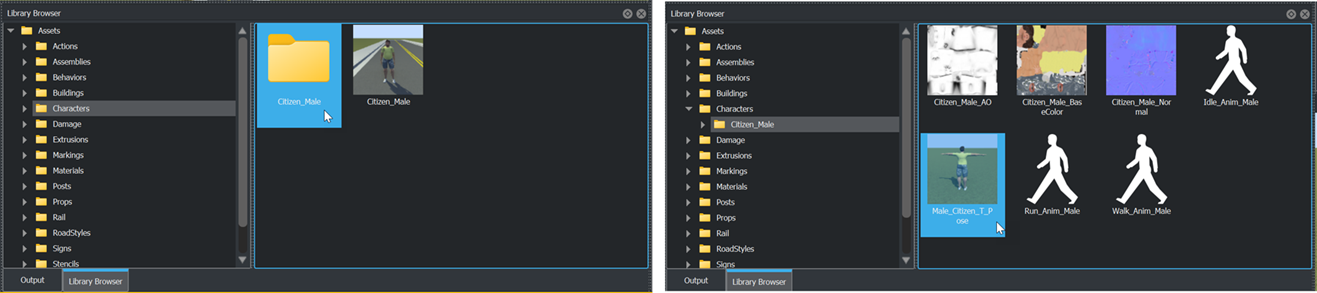
RoadRunner Scenario provides a default character asset, Citizen_Male,
that you can access by navigating to the Asset folder in the
RoadRunner
Library Browser, then navigating to the
Characters subfolder.

The RoadRunner Asset Library is an add-on product that contains a collection of additional RoadRunner Scenario character assets. This table lists the names and icons of the character assets in the RoadRunner Asset Library. For more details, see RoadRunner Asset Library Add-On.
Additional Character Actor Assets in RoadRunner Asset Library Add-On
|
|
|
|
|
|
|
|
Citizen Female
Business01 | Citizen Female Casual01 | Citizen Female Elder01 | Citizen Male
Business01 | Citizen Male Casual01 | Citizen Male
Child01 | Citizen Male
Elder01 |


You can also create your own custom character meshes to use in RoadRunner Scenario. To learn how to import custom character meshes, see Import Custom Character Meshes.
Pedestrian Attributes
The Attributes pane for each pedestrian actor contains several attributes you can adjust to customize the actor. When you select a pedestrian actor in the Library Browser, the Attributes pane displays the OpenSCENARIO Category attribute and a list of additional files used by the pedestrian actor for these attributes:
Skin
Skeleton
Idle Animation
Walk Animation
Run Animation

Note
The pedestrian actor attribute OpenSCENARIO Category does not affect the simulation. However, RoadRunner Scenario stores and saves the OpenSCENARIO Category attribute value within the RoadRunner project and within exported scenarios containing pedestrian actors.
Select a pedestrian actor in the scenario to view and adjust these attributes:
Name
Actor Id
Color
Actor Type
Behavior
Parent Attachment
Enable Anchoring
Anchor
Lock To Anchor
Forward Offset
Reference Line
Relative To
Offset From
Lane Offset
Travel Direction
Lateral Offset
Direction
Vertical Offset

While you can specify the Color attribute for pedestrian
actors, doing so does not affect the visual appearance of the model. Like some
vehicle actors, the colors of the Citizen_Male actor in
RoadRunner Scenario are predefined. To learn more about character assets and their
attributes, see Character Assets.
Movable Object Actors
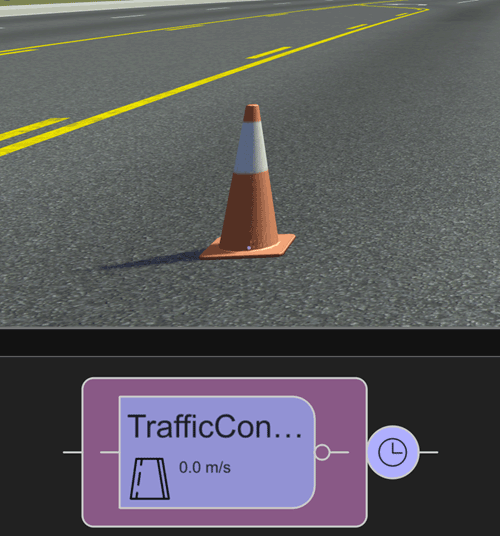
Movable object actors are assets with the Default Type of Movable Object. Like vehicle and pedestrian actors, when placed in a scene, movable object actors automatically snap to a lane on the road and their heading faces the direction of the lane. Movable object actors enable you to convert prop models to actors in your scenario and separate them from prop models that are part of the scene. Because movable object actors exist as part of the scenario, you can relocate them within a scene, or load them into different scenes along with other scenario components. For more information about relocating scenarios, see Scenario Anchoring System and Relocate Scenarios.
Note
If you use an external simulator, such as CARLA or esmini, to simulate your scenario, movable object actors may not display or function correctly.
Default Movable Object Actor Logic
A movable object actor is an actor type distinct from vehicle and pedestrian
actors, however, they use similar behavior logic to vehicle and pedestrian actors.
During scenario simulation, movable object actors follow logic defined in the
Logic editor. When placed in a scene, movable object actors
also have a default initial phase, an end condition of 60 seconds, and a fail
condition for any collision between two actors. However, the default initial speed
value for movable object actors is 0.0 m/s.
If you change the speed of a movable object actor to a non-zero value, the actor moves along the lane or path on which you have placed it.
Movable object actors follow the same built-in behavior as vehicle actors, and you can define additional logic for them by adding action phases and conditions in the Logic editor. To learn more about vehicle behaviors, actions, conditions, and defining scenario logic, see Built-In Behavior for Vehicles and Define Scenario Logic.
Movable Object Actor Assets
Movable object actors do not have unique assets. Instead, you can convert any
existing asset in the RoadRunner Scenario
Library Browser into a movable object actor, including vehicle
and pedestrian actor assets. To convert an asset into a movable object actor, in the
Library Browser right-click the .fbx_rrx
file for the model. Then, in the context menu, select Default
Type, then Movable Object.

Alternatively, you can import your own custom assets to use as movable object actors. For more information about how to import assets into RoadRunner, see Create, Import, and Modify Assets.
Note
Movable object actors do not have animations. Vehicle and pedestrian actors converted into movable object actors lose their associated animations.
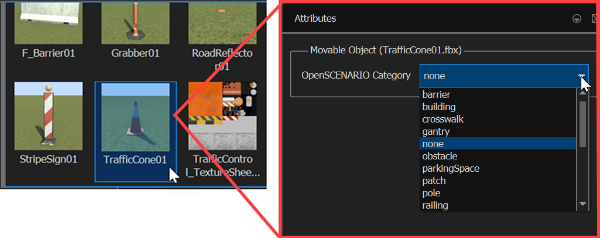
Movable Object Actor Attributes
Movable object actor assets, selected in the Library Browser, have only a single attribute, OpenSCENARIO Category, which specifies the category for the actor when exported to ASAM OpenSCENARIO® formats.
In ASAM OpenSCENARIO XML, movable object actors have the properties
MiscObject and miscObjectCategory. In
ASAM OpenSCENARIO DSL, movable object actors have the property
movable_object.
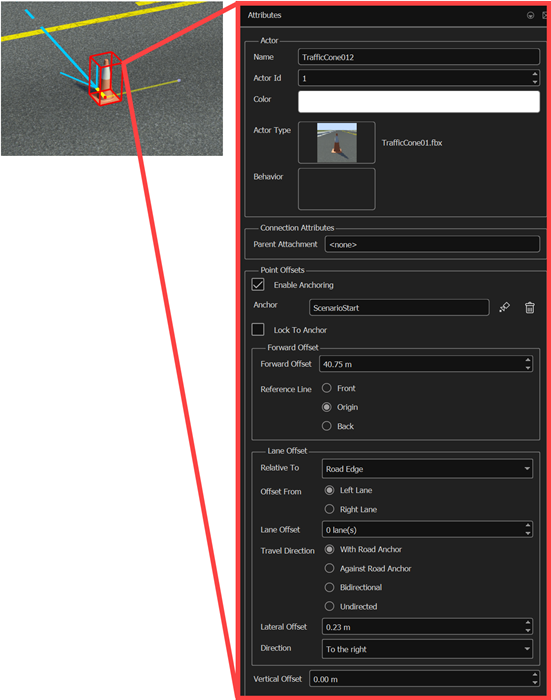
Select a movable object actor in the scenario to view and adjust these attributes:
Name
Actor Id
Color
Actor Type
Behavior
Parent Attachment
Enable Anchoring
Anchor
Lock To Anchor
Forward Offset
Reference Line
Relative To
Offset From
Lane Offset
Travel Direction
Lateral Offset
Direction
Vertical Offset
While you can specify the Color attribute for movable object actors, doing so does not affect the visual appearance of the model. The prop models in RoadRunner Scenario have predefined colors.
Movable object actors do not have a Default Color attribute. If you convert a vehicle actor into a movable object actor, even if you change the default color beforehand, the movable object actor displays only the predefined, white color from the texture file when placed in the scenario.
Traffic Signal Actors
Traffic signal actors represent the signal heads at junctions that influence the
behavior of other actors during simulation, such as a stop light that controls the flow
of traffic, or a pedestrian crossing light that indicates when it is safe for
pedestrians to enter a crosswalk. To create traffic signal actors to use in your
scenario, you must first configure your traffic signals in Scene
Editing mode using the Signal Tool. RoadRunner Scenario uses the signalization data of the junctions, and phase information
created with the Signal Tool, to simulate traffic signal actors. To convert
signal heads into traffic signal actors, in Scenario Editing mode,
select the Traffic Signal
Tool and click the Create Traffic Signal Actors ![]() button to create traffic signal actors for all the
signal heads at the junctions of a scenario. To create traffic signal actors
selectively, first select specific signal heads, and then click the Create Traffic
Signal Actors button. Unlike the other actor types, you cannot move traffic signal
actors while Scenario Editing mode is active.
button to create traffic signal actors for all the
signal heads at the junctions of a scenario. To create traffic signal actors
selectively, first select specific signal heads, and then click the Create Traffic
Signal Actors button. Unlike the other actor types, you cannot move traffic signal
actors while Scenario Editing mode is active.
Default Traffic Signal Actor Logic
Traffic signal actors do not have their own logic in the
Logic editor, but you can use them in Traffic
Signal conditions to determine the allowed movements of actors on
the junction maneuver gates associated with the traffic signal phases. For more
information on the Traffic Signal condition, see Traffic Signal Condition.

Traffic Signal Actor Assets
RoadRunner provides a default traffic signal asset,
Signal_3Light_Post01, that you can access by navigating to
the Props folder in the RoadRunner
Library Browser, then navigating to the
Signals subfolder.

The RoadRunner Asset Library is an add-on product that contains a collection of additional RoadRunner signal assets. For more details, see RoadRunner Asset Library Add-On.

You can also import your own custom assets to use as traffic signal actors. To use an asset as a traffic signal actor, its Default Type must be Signal. For more information on how to create a custom traffic signal in RoadRunner, see Create a Custom Signal Prop.
Traffic Signal Actor Attributes
The Attributes pane for each signal asset contains several attributes you can adjust to customize the signal. Select a traffic signal asset in the Library Browser to view and adjust these attributes:
Variant
Name
On Texture
Off Texture
Category
Supported Turn Types
States
State Turn Types
You can also optionally add and remove variants and states from signal assets. For more information on signal assets, see Signal Assets.

Select a traffic signal in the scenario view to adjust these attributes:
Name
Actor Id

Actor Default Types and Initial Phases
To function as an actor, a vehicle, character, movable object, or traffic signal must have the Default Type of Vehicle, Character, Movable Object, or Signal respectively. These types assign the default logic to an actor when you place it in a scenario, and enable the actor to perform the actions assigned to it through the Logic editor.
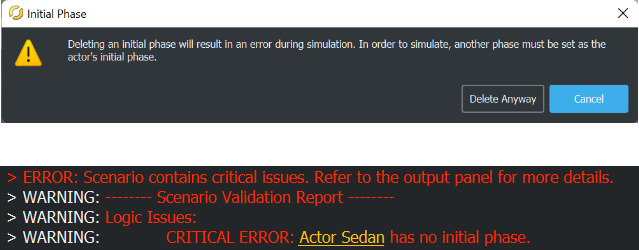
For the simulation to run, every vehicle, pedestrian, and movable object actor must also contain an initial phase. RoadRunner Scenario creates these automatically when you place a vehicle, pedestrian, or movable object actor in a scenario. If you delete the initial phase, RoadRunner Scenario first displays a warning message stating that the simulation cannot run without the initial phase, and provides two options: Cancel or Delete Anyway. Select Cancel to cancel the delete operation, and Delete Anyway to delete the initial phase. Running the simulation without an initial phase for any vehicle, pedestrian, or movable object actor in a scenario causes the simulation to fail and return an error in the Output pane.
Remove Initial Phases from Vehicle, Pedestrian, and Movable Object Actors
If you want to place a vehicle in a scene as a prop without an initial phase or other scenario logic, change the Default Type to Prop Model.
To convert a vehicle actor to a prop, in the Library Browser, right-click the vehicle asset and, from the context menu, select Default Type, then select Prop Model.

You cannot directly convert pedestrian actors to props due to the additional skeleton and animation file references assigned to Character assets upon creation. However, because the asset file for the character mesh has a Default Type of Prop Model, you can place the character mesh as a prop in a scene without an accompanying initial phase.
To access the character mesh file of the Citizen_Male
pedestrian actor, in the Characters folder of the
Library Browser, navigate to the
Citizen_Male subfolder. The
Male_Citizen_T_Pose.fbx file is the character mesh.
To place the Male_Citizen_T_Pose.fbx as a prop in a scene,
first switch to Scene Editing mode, then drag the asset file
from the Library Browser into the scene canvas. Because
character meshes are prop models, which do not reference accompanying animation
files, the model displays only its default pose when placed in the scene.
To convert a movable object actor back to a prop model, simply right click the asset in the Library Browser, select Default Type, then select Prop Model.
Like other RoadRunner prop assets, when you convert an actor to a prop and place it in a scene, you can adjust its position and rotation. However, once converted to props, actors no longer have associated scenario logic or animations, and do not move or influence scenario behavior when you simulate the scenario. You can place props only while Scene Editing mode is active.
Actor IDs
Each actor requires a unique Actor Id. If you attempt to simulate a scenario in which two or more actors share the same Actor Id, the simulation fails and returns an error in the Output pane. RoadRunner Scenario automatically assigns each actor a unique Actor Id when you place them in the scenario, but you can manually set the Actor Id value for an actor in the Attributes pane. The Actor Id field accepts only positive integer values.
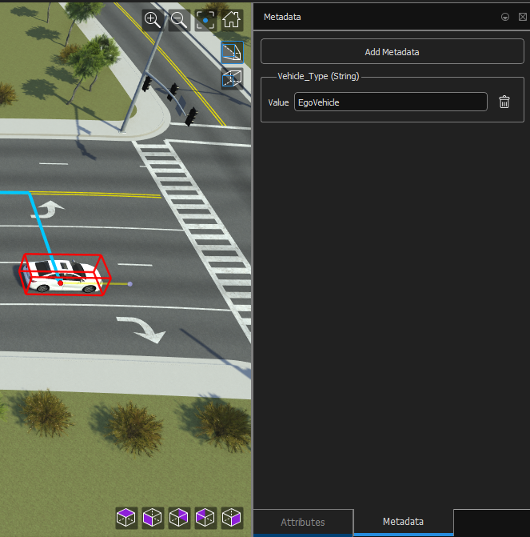
Add Metadata
You can use the Metadata pane to add metadata for an actor in a scenario. To add metadata for an actor in the scenario, follow these steps:
Select the actor from the scenario, and click the Metadata tab to open the Metadata pane.
Click Add Metadata, which opens the Add Metadata dialog box.
Specify the name for the metadata to the Name parameter. Select the data type of the metadata value by setting the Type parameter to one of these options:
Boolean,Integer,Double, orString. Then, click OK.
To specify the value for the new metadata, set the Value parameter of that metadata entry in the Metadata pane.