Modeling and Control of a Dual Active Bridge (DAB) for Electric Vehicle and Battery Charging Applications - MATLAB & Simulink
Video Player is loading.
Current Time 0:00
Duration 36:42
Loaded: 0.45%
Stream Type LIVE
Remaining Time 36:42
 
1x
  • Chapters
  • descriptions off, selected
  • captions off, selected
  • en (Main), selected
    Video length is 36:42

    Modeling and Control of a Dual Active Bridge (DAB) for Electric Vehicle and Battery Charging Applications

    Overview

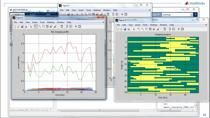
    Dual active bridges are seeing a large increase in popularity as more converter applications require bi-directional power flow and isolation. This is driven primarily by growing needs for battery charging and grid integration of renewables. Both requirements are achieved with dual active bridges while offering design flexibility and high efficiency with soft switching. To best utilize this topology, engineers need to understand the behavior of the circuit and the trade offs of different switching and control strategies. Learn how to explore this design space and implement various switching and control strategies targeted to maximize dual active bridge performance.

    Highlights

    This webinar will dive into the following topics

    • Why dual active bridges are becoming so popular
    • Common topologies and how to simulate them
    • Basic phase modulation control
    • Trapezoidal and triangular modulation control

    About the Presenters

    Joel Van Sickel is an application engineer on the Simscape Electrical product field team.  He primarily focuses on the analysis, design, and control of systems that include power converters and electric drives.  His background in industry was as a hardware design engineer for radar power supplies and shipboard electrical systems.  He received his PhD in Electrical Engineering from the Pennsylvania State University in 2010.

    Shankar Abhinav is an Application Engineer at MathWorks. His expertise is in Hardware in the loop and rapid control prototyping for verification and validation of advanced control algorithms for complex cyber physical systems. His work focused on modeling and distributed control of power electronic devices for small scale power systems. He received his PhD in Electrical Engineering at University of Texas at Arlington in 2017. 

    Recorded: 28 Mar 2023

    Hello, everyone. And welcome to this webinar on Modeling and Control of Dual Active Bridges. My name is Joel Van Sickel. I'm joined by my colleague Abhi. We are both application engineers at MathWorks who support Simscape Electrical.

    And our past year has seen a lot of customers designing and analyzing dual active bridges. And we don't actually have a lot of content going over that, so we're going to be doing this webinar and also releasing some web pages and articles to cover it. And so this is going to be a slightly different webinar than we usually do.

    Usually, we're a bit more demo focused, a bit more selling-our-tools focused. This is a much more foundational webinar. Honestly, the takeaways are true regardless of the analysis tool you're using. But we think this foundation is really important.

    And so the way we're going to organize this is I happen to have been supporting the customers looking more into modulation techniques in the single phase operation. So Abhi is going to guide the discussion by asking me questions about that.

    Abhi has done a lot more with some of the more traditional model-based workflows. So we're talking like embedded code, generation for the controls, hardware in the loop. He's also been doing the work with the three phase dual active bridge. We don't have time to go into some of the more advanced MBD stuff, but we are going to get into the three phase dual active bridge.

    So we'll switch roles. I'll ask him questions, and he'll talk more at that point. So that gives you some idea why we're both on the line. And then we'll be providing both of our emails afterwards for you to contact us if you want to go deeper into any of these, or explore some of the model-based design activities using MathWorks tools.

    So as I mentioned, Abhi's going to lead things off with questions. It might be kind of obvious which question he's going to start with since it's just there on the slide. But why don't you kick things off for us, Abhi.

    So, like stated, why is the dual active bridge so popular right now? Why we've been seeing so many requests for it?

    Yeah. So hopefully, each of you on the line know why you're here and why you're interested in dual active bridge. But to keep it short because I could talk about this for 20 minutes, in the name, dual active bridge, it has two full bridges on it. That gives us a bidirectional capability.

    And then we have this A/C link internally that has the inductor and a transformer. So the inductor is predominantly giving us energy storage. And the transformer lets us do voltage transformation. It also gives us isolation.

    So it gives us a lot of design flexibility, and it gives us isolation. And with this type of topology, having inductive energy storage also gives us zero voltage switching. So to summarize that, it gives us-- it's a bidirectional, efficient, isolated converter with a lot of design flexibility.

    And that's becoming more and more important, predominantly because of some of the forces behind electrification. A lot of it comes down to, we're seeing energy storage and many more applications, predominantly as batteries. And then we're also seeing a lot of needs for low and medium voltage connections for doing better usage of renewables.

    And the dual active bridge just gives you a really nice, efficient way to control the energy flow in those systems. And it's efficient. It's isolated. So it just makes it a lot easier to use in a lot of those situations. So there's other things that make it popular, but those are some of the main driving forces behind it.

    And one other thing I want to go over is a quick crash course on dual active bridges and how they operate before we start talking about what do you need to do to simulate them. So we have this animation here, that I'm going to pause to explain what's going on. We're showing this animation for two reasons.

    One, it lets us explain what these plots are because you'll see these a lot in the literature. And because this is a recording you'll be getting later, this animation becomes much more useful when you have a recording of it and you can control the playback. But for now, let's just explain what's going on.

    This is the instantaneous inductor current through here, so that's not too complicated. But then we have this plot here, which is sort of unique to the dual active bridge. And what it is, it's the plot of what the voltage applied by each full bridge is.

    So this blue line is showing what-- over here I color coded it, so it shows what V2, whether positive or negative, is being applied at this location and this location. And then the green one, color coded here, shows whether it's positive or negative V1 being applied here.

    And so because of that, we can apply, essentially, four different voltages across the inductor. And that's pretty obvious because you'll see four different slopes. And because this isn't a resonant converter, it's critical that we intentionally flip the polarity using these transition periods.

    And so this can be used to do positive or negative power flow. The bigger the phase angle, basically, the more power is flowing through this. So right now, it's transitioning, but after transitions I'll pause it again. We've got positive power flow, positive power flow. That's happening here and here. And then these are the transitions.

    And we can flip the phase angle, and now the current flows opposite. So now we have negative to negative. So as I mentioned, these animations will be more useful if you come back to them once the recording has happened, but we did want to make them available. And we can share the animation file with you if you email us and ask us for it.

    One other thing I wanted to explain before we dive into things is the importance of zero voltage switching because you get it as part of the design. So zero voltage switching is essentially if I turn my device on when it's not blocking voltage. Right now, this device is blocking voltage. We're conducting through here. So this is essentially zero volts, and this is plus V1. It's blocking that voltage.

    Diodes are essentially free to turn on when they're blocking current. So if we turn this off, because of the inductor, that's why the inductor is important, it forces the current through the diode, which will then bring the voltage here, not to zero volts, but very low, maybe two volts, depending on your device. Once that happens, instead of blocking hundreds of volts, it's blocking two volts. So it's much cheaper to turn on this device.

    So the order of operations is we're going to turn this off, force the conduction through here, and then we're going to turn the MOSFET on. And so this is animated. I've exaggerated the dead time so that the animation actually captured this transition.

    If you did miss it, we turn off the bottom device. So this is now turned off and the diode is conducting. Now that the diode is conducting, it's basically free to turn on this device. And so we can turn it on. And it turns on. And this is happening with all of the half bridges. So essentially, you're getting all of your turn on events for free.

    Because you have to have that dead time here because this is a half bridge. So anybody who's used a half bridge, you need dead time or you'll get shoot through and you'll blow up your devices. So you have zero voltage switching. So this is a very efficient converter even though you have all of these extra components.

    So I wanted to make sure to address some of those fundamentals about dual active bridge operation before we get more into the simulation and control aspects of things. Sorry for taking all the time, but kicking it back to you, what are some questions you want to start with?

    So we talked about the general overview of the dual active bridge. The next stage, like you said, would be simulation of it. And when you want to simulate it in any tool, you have to choose the fidelity, particularly for the switches. So can you talk about how to properly choose that switch fidelity?

    Yeah. So let me pull up a model. So here is a dual active bridge, that the screenshot was from, with the controls added. So this dual active bridge, we've already run it. It's doing-- I'm tracking a voltage. So we're tracking-- this is the load voltage, and here's our reference voltage here. So it's a very simple loop just to show the basic operation.

    This is a design we've taken from one of TI's public designs that they provide. And it's doing voltage mode control. There we go. And this is the basic operation. So it's tracking voltage, and we're going to zoom in to some of the individual device currents that aren't visible at the system level to explain how transistor fidelity affects it.

    Because what happens is you can essentially do a piecewise linear switch, which is a very simple, fast device, or you can do a non-linear switch, which is-- that's what you get with a SPICE simulation. With Simscape Electrical, you can import a SPICE model, or we have generic detailed parameters that you can set to just generically simulate from your data sheet what your devices are.

    So let's look at what the trade offs are in those fidelity levels. I'm going to pull up a plot here. This is the detailed switch. So we're going from 0 to 800. So this is the turn off event of a detailed switch. And this is the turn off event of a piecewise linear switch.

    So notice the detailed switch, we are simulating the dynamics. So here is the voltage, essentially, linearly getting higher as it turns off. And once we hit that blocking voltage, our current starts to drop. And so this is a very detailed model of the dynamics. We're talking nanosecond resolution.

    And this could be very useful, depending on what you're doing. This is incredibly important if you're sizing your gate driver, if you're picking it, looking at your gate resistance. This is incredibly important. It's figuring out what your dead time needs to be. You might use this for your thermal analysis. They're all alternatives.

    But for almost everything else, this level of detail is unnecessary. And if you go to the switched linear model-- There were 50 time steps, I think, used to do this calculation. And for a switched linear, we just turn it on and off instantly. So it took two time steps to calculate.

    So this model, if I'm using switched linear pieces, will be, essentially, two orders of magnitude faster than detailed switch model. And since the majority of your design and analysis work will not need this level of fidelity, we recommend that you turn on this level of fidelity for the specific applications you need it, but for the rest of the time just use a switched linear model. And so the nice thing is you can mix and match those in our tools.

    To show you why it doesn't really matter, here is looking at the individual. So in that bigger system simulation we looked at, this is the actual single device operating. I have exacerbated the dead time so you can see the diode current more clearly, but this is what's happening. And if I switch this to a detailed model, nothing really changes.

    So yes, at those switching events, I'm getting much more detail. But at a system level, nothing is really changing. And so for the vast majority of your modeling, you just don't need this level of fidelity. So hopefully that answers your question, Abhi.

    Yeah. And I guess that change from instantaneous from zero to what the voltage output's supposed to be, that is an ideal behavior. And that's why in Simscape Electrical we call those switches ideal, MOSFET ideal. They have all the parameters for you to adjust, but it's just that ideal behavior exhibited for turn on and turn off.

    Right. Yeah, that's a good point. Because they still capture your conduction losses. They still have a voltage drop. They still have an on resistance. So they're not ideal in the terms of they're like not acting like superconductors. They're just ideal in that the transition happens instantly.

    The other task that, typically, you have to do in simulation as a topology analysis, is look at thermal losses to design the packaging. So can you talk about how do you do that?

    OK. Abhi, So that's a really good question because of this. So as I mentioned, here, we're actually simulating the turn on turn off dynamics. So we have a nonzero voltage here and a nonzero current here. So we're actually, if we were to plot the multiplication of these, we would actually get a switching loss like this, if we plotted that. We could plot V times I and just get the exact switching losses from this simulation.

    This, well, you just get zero. So by default, a switched linear model doesn't capture your switching losses. So you might think, well, thermal's one of the most important things to look at when you're analyzing these devices. So that means I don't want to use switched linear. But we are capturing what the levels were before and after a switching event. And because vendors are very nice to us, we have these data sheet entries.

    So we have what can be these plots, which can be put into lookup tables. We can see what the switching losses are across different variables. And we're using Infineon devices right now, so they actually have an XML sheet that MathWorks tools has an import function for. So we can pull in all of these data sets, we don't even have to manually extract them, and use those to calculate what the switching losses are for a piecewise linear simulation.

    And that looks like-- So if we go to the same individual device, we're just looking at the MOSFET current right now, so I haven't plotted the diode current, what happens is we grab the data point at switching and right after switching. So we get what the transition voltage and currents are, and that is enough information to use those plots to calculate what your switching losses are.

    And so you can see in this simulation we are getting the turn off losses. So when these devices turn off, we're getting the turn off losses because the diode is conducting. You can see that we're already at zero voltage before we turn the device on. So yes, the current goes to a nonzero value, but our voltage stays at zero. So there are no turn on losses in the system.

    And so the nice thing about this is it means that we can use the piecewise linear model to capture the switching losses without having to go back to that more detailed slower simulation. And so this is actually kind of an industry standard of how to do this. And oftentimes, it's easier to keep accurate because this is based off of data sheets.

    Whereas the other method, if we go back here, calculating your switching losses from a model like this means this simulation, these dynamics, need to be spot on to capture those details correctly. And it can take a lot of time to dial in your model to get those perfect. Or you can just use the data straight off of a data sheet. And so they've got the data based on temperature, what your gate's resistance is, voltage, currents, all of that.

    And so they're very nice initial estimate. And obviously, you're going to need to do some real world testing based on your packaging and thermal. But this is actually the preferred method using the piecewise linear with these lookup tables to capture your switching losses this way. So that is the main way to do it. But you always have the option of using the detailed transistor models to capture your switching losses, as well, because they will still capture them.

    So in this case, in the switching losses, you are incorporating the dead time. Right? So is there a trade off between when you incorporate that time versus you don't?

    Yeah. So the theme of this, you can use the detailed transistor model, or you can use the faster switched linear transistor model because you don't need that detail. Dead time is another detail that sometimes you need and sometimes you don't need. So right now, this model that I'm showing you right here, this includes dead time.

    I'm going to rerun it, and we're just going to count it out, how long it takes with the dead time. 1, 2, 3, 4, 5, 6, 7, 8, 9, 10, 11, 12, 13, 14, 15, 16, 17. I know. Real interesting, right? But, and real specific timelines. But that's with dead time.

    If I take out the dead time, and rerun the simulation and count it through with you again-- 1, 2, 3, 4, 5, done. So noticeably faster without the dead time. And that's because we're lining up PWM signals when they're transitioning.

    So before, there's that little 100, 200 nanosecond gap. It takes more time steps to simulate that and to simulate them happening at the same time. At the system level, not a lot has changed without that. It's still pretty accurate. But my simulation speed has gotten two or three times faster.

    So there's a lot to be said where maybe you don't simulate the dead time when you're doing a lot of your system level analysis, when you're investigating your control loops and stuff like that. You obviously are going to care about dead time when you're investigating your modulation techniques because that's relevant. But it does give you this opportunity to get a 2 or 3x speed up on your model.

    And all you have to do is turn off the dead time, so it's pretty easy to get. But the biggest danger of removing your dead time comes from, if you're doing that thermal analysis, because the dual active bridge's thermal analysis is so dependent on that zero voltage switching being simulated, that doesn't get simulated if you turn off dead time.

    So if I switch to using no dead time here, I am no longer modeling the current going through the diode first and then turning on the MOSFET. I'm instantly turning off the lower MOSFET and instantly turning on the top MOSFET.

    Because it's an ideal device, I can do that without seeing shoot through. So that's a trick I can use to speed up my simulation, but now I'm going to see turn on losses that aren't actually in the system.

    So here's the realistic system. So I can turn off that dead time when I'm not looking at the thermals and I'm not particularly looking at details of my modulation approach. But when I'm looking at details of my modulation approach, when I'm doing the thermal analysis, I need to make sure the dead time is incorporated or I'm actually going to triple my switching losses and get bad data.

    And this is sort of the name of the game when you're modeling these systems. You can save yourself a lot of time by turning down the fidelity, but you just have to be cognizant of what you're sacrificing to do that. Because every time you make your model faster, you're doing that by sacrificing some level of fidelity.

    And if you know what you're sacrificing, you're fine. But if you don't know what you're sacrificing, most people won't do that. So they'll just use the highest fidelity, slowest simulation because they don't know when they can take away bits of detail. So hopefully, this gives you the insight you need to know like, oh, here's when I can turn off these level of detail, speed up my simulation, and when you need to go back and put them on.

    So the other aspect of simulation speed that typically comes in is solver selection.

    Yeah. So with the dual active bridge, we recommend using a variable step solver. I left this in here. You notice right here, the current isn't balanced. And that's because the dual active bridge is actually very sensitive to what's going on in that A/C tank. And if your current's not balanced, it's not going to be centered on zero. And you want it to be centered on zero.

    You can force this to happen by using current mode control, you can put in a DC blocking capacitor, but if you use a fixed step, that's going to add quantization error to your model that's going to exacerbate this imbalance. So in this case, this imbalance is because I'm actually letting that happen in my design.

    But if I had a current mode controller, if I had a blocking capacitor, but I added a fixed up simulation, I would exacerbate this in an unrealistic way. In this case, this unbalance does exist in my system because I'm using a variable step, and I haven't done anything to address that.

    In our tools at least, the variable step simulation will, most of the time, be faster than a fixed step because you need such a small resolution to capture the dynamics of that A/C tank accurately. And the variable step solver is very good at just hitting the points it needs to and then moving on because the RC time constants of the system are not that fast. It's more of the switching frequency that requires the smaller time constant.

    Got it. And now that we talked about the topology, setting up the simulation, the next part is the control. So what is the basic control premise here?

    So the basic control starts with what is called single phase modulation, which is what we've been showing. Here's a little app I made so that you can explore that. Delta is the phase modulation. So as I change delta, the bigger it gets, the bigger my inductor current gets with the bigger power flow we're getting through the system.

    And so this is the first control method you'll see. It's called single phase modulation. And so that's what we have here. This is the single phase modulation. We only have one control variable. There's not really a lot to talk about because it's so simple.

    In this case, I just have a PI loop with a rate limiter, and that's getting me the behavior I want. In production, you would probably turn this into a current or a power loop at the faster end. You'd get better response than I'm getting here.

    Again, this is just quick and dirty to show what's going on. So single phase modulation, very easy to implement. You've got some options with it, but you do have the ability to make things more controllable than that.

    So right now we just have that one control variable. But we can have more control. There's eight gate signals here, so there's an opportunity to have more control. But how do you want to do that? There are a couple of different approaches. Some will have a second phase shift that you add.

    The one we've chosen to show here is based off of the original formulation of trapezoidal and triangular. So in that dissertation, they create two more control variables called sigma one and sigma two. What they do is they keep a symmetrical, not a square wave anymore, but they keep a symmetrical wave that's kind of like adding dead time.

    So it's taking advantage of the fact that you, yes, you have four voltages you can apply, but there's a fifth voltage, at basically no voltage, that you can apply. And you can see here it keeps it symmetric, but now we also have this zero voltage we can apply to both these signals.

    And this gives you a lot more control over what the inductor current will look like. And that can be used to basically construct a couple of different forms of control.

    The first is called trapezoidal. And so trapezoidal is very similar to what we've seen before, only it's got this time at zero. And this lets us minimize our conduction losses. And then we can take it even further and go to triangular, which minimizes conduction losses, but it also actually gets rid of one switching point. It moves it here. And that gives us zero current switching for that application.

    And so you'll see this has a lot of interest when you have a high voltage primary and a low voltage, high current secondary, particularly for some battery applications. And you want to take your design parameters to set it up so you can use this triangular modulation on the high current side to get that zero current switching to keep your switching losses low.

    And so we also have a model implementing this. And so this is a model that does trapezoidal triangular control. And so typically, at higher powers, they use trapezoidal modulation, and then once you get to a certain power that's low enough, you can transition to triangular.

    And essentially, this will max or minimize your conduction losses and potentially minimize your switching losses. And the results are going to look a lot better than the single phase modulation.

    So I don't want you to take that as a rule that this control method is better, because the implementation-- because I was following a dissertation by Shibley for this. So his implementation gave me a way to very easily implement feedforward control while doing this. So my other control method does not have any feedforward control. So this is obviously having better performance because of that feedforward control.

    So just because you're seeing better dynamics here does not mean this control method is better. We don't want to bias you towards anything. But this control method does work nicely. And the big difference I want you to see is what's happening here is these currents for the same converter, the same voltages, here and here.

    The magnitude of these currents was more like 50 amps in the other approach. And so trapezoidal and triangular really bring down what those currents are going to be, particularly at lower powers. The more you're pushing your dual active bridge to its power limit, the less of an impact this type of modulation technique is going to have on improvement.

    But we can zoom in and see that this is, indeed, implementing that trapezoidal rule. So we're getting this, basically, dead time in the application of voltages, which is really helping us improve the efficiency.

    But this comes at a cost. If you remember, the single phase modulation is incredibly simple to implement. Trapezoidal triangular, if you go with the first formulation, I have all of these systems precalculating stuff. It's based on parameters of the system, which makes it less robust. I have current feedback for my modulator.

    There's a lot going on here that you don't have to deal with if you use single phase modulation. So yes, you can get more efficient operation out of the exact same topology just by improving your modulation technique. But it comes at a design cost, and it comes at a controller complexity cost.

    And so in certain applications, getting that extra efficiency is well worth the engineering effort and more complicated control. But there's other applications where, if, again, if you're at the higher power levels, it's not going to give you much benefit, and it's just not worth doing it.

    And so these are questions where the right answer changes so much depending on what your specifications and requirements are. And we can't really tell you that, but we can provide you a baseline to do that evaluation.

    And I can share this model if you want to take this and run with it. Eventually, it will be shared publicly, but it's not on GitLab right now. So email me and I'll send you the version of it we have.

    But Abhi, I think we get to change roles at this point. Or do you have any more questions?

    I think before we change, one last question is, how do you change direction of power?

    Oh. So changing the direction of power is-- Let's just go back to the animation. The direction of power is basically just the polarity of the angles. So I'm switching which half bridge leads to other half bridge with this 50% duty cycle.

    And that changes whether it's positive or negative power flow. So it's really simple. When you implement single phase modulation, it'll automatically be bidirectional. As long as you let your phase angle shift between positive and negative, you will automatically have bidirectional control.

    Understood.

    All right. So that means we are changing roles. So now Abhi gets to talk. I am done hogging the limelight. So three phase dual active bridge. Abhi, why don't you give us a quick rundown of what this is, how it's different, and sort of compare and contrast it with the single phase.

    Sure. So one of the things about DCBC converters is we quite often stack them, but this is not just three single phase dual active bridges connected in parallel or connected together. We make use of the three phase coupling.

    So there's a three phase transformer in here, which in itself brings some benefit. It might be easier to source a three phase transformer. The cost might be lower. But the number of switches go up. You're adding four more switches. There are some benefits. Conduction losses are reduced. Switching losses are reduced. But it comes at the cost of increasing switches, increasing inductors, as well.

    But the main benefit of this topology comes from the output filter requirements. The filter requirements come down significantly, so it's a far more improved output current that you get out of the converter.

    And the control technique is the same. Joel just sort of refreshed a single phase modulation approach. And that's the same thing that we'll use here. Between the two sites, the primary and secondary, there's a single phase shift being applied.

    And let's take a look back at a single phase dual active bridge, use it in open loop, and then we'll try to do a comparison. And this time I'm just going to focus on the inductor current and the output current before we filter it.

    So if you take a look at this. Now I'm just going to say this is quite high. Both the inductor current and the output current is high. When we compare it to the three phase dual active bridge, this will become a little bit more obvious. But clearly, on the inductor side you can see the peaks are much sharper and higher.

    So if we now just take that same PI up north and just add some more switches, and take that single phase transformer and modify it to a three phase transformer, simulated, but the same phase shift in open loop configuration, what we get is, on the output current and the inductor current, much better performance.

    The inductor current looks much more sinusoidal. The peaks are lower. The filter requirements come down significantly because the output is much cleaner before we connect it to the . Now, because the inductor current is lower the conduction losses are reduced.

    The three phase nature also brings some benefits. We don't turn off the switches at the peak current anymore because of the natural coupling of three phases. So all of that brings some switching losses and conduction losses benefits.

    So if you do a comparison of both the plots together, you'll see we'll be using the same scaling. So there's far better inductor current and output current performance. It's particularly useful for any case scenario where you might have stringent PHD requirements. And your filter design can be much more simplified.

    But this is not a direct comparison. I am doing a cheat. I have increased the number of switches. I have increased the number of inductors, as well. So this actually adds another layer to your design space, which is a consideration that you'll have to do.

    Yeah. So-- Yeah, so I think it's-- I'm going to highlight this. This is the same scale as this. So this is like where the output current of the three phase is living, and the single phase has this much higher route. So that's what you're talking about in regards to the filter requirements come down a lot?

    Yep. And now that we've looked at the three phase DAB, and some of the basics of the single phase DAB, to summarize, I think one of the things that makes the dual active bridge such an interesting topology is the design space and the considerations that we might have to take. Did you want to have any ending comments on that?

    Yeah. I mean, the big thing I always want people to take away from the modeling side of things is be very cognizant of what you need from the specific analysis you're doing, and only add that level of detail to your model. Because that's going to save a lot of your time because it takes less time to make a lower fidelity model, and it simulates faster. So you kind of get the best of both worlds.

    And then, our tools particularly, are designed to jump between the different fidelity levels. So that's something we didn't really go over, like how you manage your model to do that sort of thing. Because again, we're not really teaching you a lot about our tools. Most of what we've shown here is true across that space, but we can teach you that.

    So please, we'll go to the next slide. Our contact information is here. We love exploring this design face with the customers who will share what they're doing with us. It's been really interesting over the past year.

    And we have customers doing the three phase stuff. We have customers doing the single phase stuff. We have customers doing single phase modulation. We have customers doing the triangular trapezoidal modulation. So we are seeing all of this being done in production. And everybody has different requirements, and we'd love to explore those deeper with you.

    But we also have time for questions now. So please feel free to ask any questions you might have. And then, everything I've shown here we can share, it will eventually be available on File Exchange. But it's going to be much faster just to email me and ask for the files at this stage. Because we're releasing a discovery page. We're releasing a video series.

    And so this is the very first piece of content we're releasing. So there's going to be a lag for the other pieces of content, but you don't have to wait. Because it is literally my job, and obvious job, to talk to you if you have questions. So please feel free to contact us. But now, we're actually going to get into answering the questions that you're putting through.

    Related Products

    Learn More