Medical Imaging Workflows in MATLAB
Agenda
Medical imaging involves multiple sources such as MRI, CT, X-ray, ultrasound, and PET/SPECT. Engineers and scientists must visualize and analyze multidomain image data to extract clinically meaningful information. In this webinar, explore tools and algorithms that MATLAB® provides to support end-to-end medical imaging analysis and AI workflows, such as I/O, 3D visualization, segmentation, labeling, and analysis of medical image data. Learn how to import, visualize, preprocess, register, segment, and label medical image data, and train and use AI models on the data.
Highlights
In this webinar, you will learn through demonstrations how to:
Access and visualize medical images in the Medical Image Labeler
- Interactively segment lung tissue
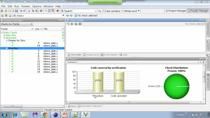
- Create a machine learning model to characterize tissue
- Explore segmenting with the MONAI Label platform
Extract and characterize regions of interest
- Create DICOM volumes
- Use radiomics features to classify tumors as benign or cancerous
Process (huge) whole-slide images
- Block-process arbitrarily large data
- Use a pretrained deep learning model (Cellpose) to segment cells
Published: 30 May 2024
Looking back on the things that were challenging or even impossible in the area of medical image processing 30 years ago are relatively easy today, in large part because of new capabilities that we've introduced through tools like the Medical Imaging Toolbox. So what we're going to talk about medical image processing using MATLAB today. And as we go through this, I'm going to do a few things.
I'm going to try to introduce some concepts in medical imaging and medical imaging process. And we're going to spend almost all of our time in three different demos that illustrate typical medical imaging workflows. In the first demo, I'm going to use the Medical Image Labeler to import, visualize, segment, and label, and then analyze CT scans of human lungs. So we're going to look at a volume. We're going to analyze it, and then we're going to calculate the lung volume.
In the second demo, we're going to use shape features and a radiomics workflow to classify tumors as either malignant or benign in a series of ultrasound breast tissue images. And in the third demo we're going to talk about the idea of blocked images. How do we segment and count cells in huge, for example, whole slide images, images of data sets that may be too big to fit in memory?
So this concept of blocked images is going to give us the tools we need to process arbitrarily large data. So we're going to talk a bit about that blocked image workflow. But we're also going to introduce cell pose, which is a new deep learning-based model that allows us to very easily detect cells using a cell nucleus model, for example.
So things that could be very, very challenging with traditional image processing or computer vision becomes relatively easy with some of our new tools. And finally, I'm going to provide you some references for further exploration of these topics. I've got a lot of slides as I go through these presentations, and I'm not going to spend a lot of time on those slides, though. I'm going to go through them very, very quickly. But many of them have hyperlinks. I'm just going to give you those as tools that will allow you to explore these topics on your own time.
What are people doing in the medical imaging workflows? Well, we have people who work with MATLAB all over the board, things like digital pathology, endoscopy, radiation therapy planning, ocular coherence tomography and ophthalmology, radiation, radiology, all kinds. Regardless of what you're doing and what you're focusing on with our tools, you typically have a standard medical imaging workflow in which you first want to import your data. And here I include with the idea of import, the idea of interoperate, which we'll talk a little bit about.
But you need to bring in your data from wherever the source steers you to, and you might need to interact with third party tools to do that. We'll talk about that. And once you have your data in, you'll need to visualize them. Once you can see things after you visualize them, that gives you a sense of how you want to approach the problem. That might incorporate and include some ideas of preprocessing, highlighting what you wanted to find in your images.
You might-- especially if you're working with different imaging modalities, you might need to m register images. So we'll talk about that. And then typically, you'll need to segment and label your data. And when you combine the idea of segmentation and labeling with human validation, then you get what we call ground truth. And ground truth is the truth of what's in your imagery in this case, with which you can then train models like deep learning models, for example, to subsequently analyze your data, to do things like calculate volumes or do finite element modeling.
OK, so first step is importing. And to focus on importing, I'm going to spend a moment talking about medical imaging object. This, again, is a new tool, a new capability introduced in the Medical Imaging Toolbox. The medical imaging volume is going to very easily allow you to focus on classical standard medical formats like NII files or DICOM files.
It's going to automatically read in and parse metadata, keeping track of things like the mapping between image coordinates and world coordinates, keeping track of coronal, sagittal, transverse orientations-- things that we need to know, but we don't necessarily want to have to manage by ourselves.
OK. So as I said, a lot of times, you can just bring in your data directly. But sometimes, especially if you're working with other people, you might need to interoperate with people using Python-based tools. I just want to give you the sense that if you have to bring in data from outside of MATLAB, that should never be a stopping point for you. We have all kinds of tools for interoperating with third party tools like Python, bringing in models from Pytorch, Caffe, TensorFlow, through ONNX, the Open Neural Network Exchange.
Just keep in mind that you can interoperate MATLAB with other environments and can call MATLAB from those environments and those environments from MATLAB. So this gives you nice options for working with our tools.
Once you have your data in, you need to visualize them. This just gives you the sense that we can visualize imagery in 2D. We can view imagery plus time. That's a video like in the upper left. We can do 3D, so you can look at volumes and scan them and rotate them, things like that.
And here's a small list of tools that we bring to the table like implay for looking at videos. And we'll talk about Medical image Labeler later. So just a little list of things for visualizing your data.
And then I want to point out that we now have introduced capabilities of doing cinematic rendering. Cinematic rendering, as you see on the right here, is a new capability in Medical Imaging Toolbox that gives you a more realistic visualization of your data. So on the left, you see the classic representation of a skeleton. On the right, you see the cinematic rendered version of it.
And you can see more subtlety. You can see shadows, get a better sense of the depth of your data. So maybe you get a little bit of a better understanding of how you need to approach analysis. And turning cinematic rendering on as easy as saying volume dot rendering style equals cinematic rendering. So give it a try. Maybe you'll see some things in your data that you didn't even recognize were there.
Once you have your data and you visualize them a little bit, you might decide you need to preprocess them. I've got one slide here on preprocessing, but I could literally spend hours and hours talking about preprocessing. Preprocessing could include anything from image adjustment, intensity modification, image, morphology, all kinds of things, speckled filtering, imagery, sampling. And this is just kind of a high-level overview of some of the things you might want to do.
You might even want to use denoising using deep learning, denoise image, denoising network, DNC, and then layers-- just all kinds of different ways that you might want to preprocess your data. And we've had capabilities for doing image registration in MATLAB, and specifically in the image processing computer vision tools, for a long time now.
But specifically, when you're working with medical data, you're often working with things like organs that are nonrigid. And you need new capabilities, things like imregdemos, imregdeform, imreggroupwise-- things that allow you to do deformable registrations so you can look at organs from different p for example.
And I'll also point out that there's an image registration tool called the Registration Estimator App that allows you to do some of those things interactively. Nice like this that allow you to just play with your data, visually changing different parameters until you find what you like. And then all these apps also generate code.
So these become easy on ramps for our registration capabilities, for example. So I encourage you to look at our apps and spend some time exploring those. And we'll talk a little bit about them as we go through some of our data.
Data in and you're preprocessed and you've done a little bit of work with them. You then need to label, and segment them. So we're going to spend a little bit of time on this. But here on the left, this just gives you a sense that in the tools like the image Labeler and the Medical Image Labeler, we have things like level tracing that will do some basic image processing and find edges.
And it's just very easy. It allows you to click on a region and select that region by the similarity of intensities. And this makes labeling large regions sometimes very quick and easy. And then on the right, you see an example of superpixels, which allows you to visualize your imagery as large collections of pixels. You can specify the super pixel size. And then you can just select on or off on those different super pixels.
And we're going to talk about using those tools inside of the Medical Imaging Labeler app. And this just gives you a sense that the app comes with a bunch of different tools that are prebuilt to automate your segmentations and your labelings. So things like active contours, image morphology, dilation and erosion, adaptive thresholding, some things that might be very useful.
You'll also see a nice how-to automate help section here. And this is great, but the greatest thing about these apps is that they're extensible. You can also add in custom algorithms. So if you want to spend some time building an algorithm for your data, and you can then import that algorithm into the Image Labeler and spend a lot of time building it on one data set and then very quickly analyze the next 100 data sets.
Also, we now have access and an interface with MONAI label. MONAI label is a remarkable new capability. It was a collaboration between NVIDIA and King's College of London. So to use this, you need R2024a. And this is a new tool, but you also need an NVIDIA GPU.
And if you have those things, I'm going to show you how easy it is to bring in your data and with a single click, automatically label essentially all the organs in the human body. So it's going to be really, really cool, and I'll show you that shortly.
So let's move on to the first demo. And recall that in this demo, we're going to use the Medical Image Labeler to visualize segment label and quantify lung tissue from a CT scan. So let's launch MATLAB 2A. And I'm going to start by cleaning my workspace and loading a project. I'm not going to talk about projects, but I encourage you to read a little bit about them if you're interested. It's just a nice way of managing your code here.
So from that, I'm going to steer to my long path, the directory that has my NIfTI data. And by the way, recognize that as I'm loading from NIfTI or from DICOM any medical file that has the metadata in it, we're automatically going to convert your intensity values to hounsfield units. So you're not looking at just arbitrary units. You're going to be looking at actual hounsfield.
And from that, I'm going to create a data source. The data source, the medical volume data source, is going to allow us to create the fundamental object that we need to manage the process of labeling. This is our ground truth medical object. So the ground truth medical object, I'm going to pre-populate it with the names of the labels I want to create-- right and left lung.
I can give it colors. I can give it label IDs. If I have a predefined-- If I have predefined labels, I can load those. But all I really need to do is create a table and then cast it to a ground truth medical object. And from that ground truth medical object, I can then just call that. I can call the Medical Image Labeler and pass it in directly.
Now, for our demo purposes, I have a gold version of that, and it's got a few different data sets in it. And I'll show you that in just a second, but I'm going to create a copy of it so I avoid overwriting anything. And then I launch the Medical Labeler.
And you should recognize that MATLAB is going to automatically create a new session for me. It's going to give me an with numbers so that I avoid overwriting anything that I've previously done.
And in just a moment, I see this three-panel view of our three different data sets. This one is lung at 001. I've got my transverse, my sagittal, and my coronal slices. And you can see the anatomical orientations are prelabeled for me-- anterior, posterior, superior, inferior, right and left, coronal, sagittal, and transverse.
And if I were creating a new session-- and I can create a new 2D or 3D session. This is 3D. But I could open current or previously saved sessions. I can import data or ground truth from previously saved sessions. But what I'm going to do here is I'm going to just select my right lung label, and start labeling. So I want to draw. I'm going to go to my draw panel.
And notice that there are several ways you can draw here. You can freehand or assisted freehand or polygons. You can use a paintbrush, or you can paint by superpixel, which is pretty convenient, especially if you control the size of the super pixels. So I could just very quickly come along and select those values. That makes this process a lot easier.
I'm just going to stop there because my favorite way of doing this is using this trace boundary algorithm. So this is just an image processing algorithm that finds the borders between regions or different intensities. So I'm going to just come along and say there's my right lung. Here's my left lung, and just move around a little till you get the segmentation you want.
And I want this little tail here. So I like that. That looks pretty good. So I've labeled one single slice in the coronal orientation. And you can see that here on the transverse slice, I could do that slice by slice, but I'd like to automate.
So I'm going to come along to my automation tab. And you see that there are several automation routines, including some image morphology, erosions, dilations, active contours. That works really well. And again, play with these. See which ones you like. But I really like active contours.
So I'm going to specify the direction I want to move in. And again, I like working in the coronal direction, so I'm going to select that. And I'm going to automate the processing using the active contours, starting with this label as a seed,
I'm going to specify-- let's go, for an example-- slice. We want a slice somewhere around here, maybe 145. OK, so I'm going to say, automate from slice 256, where we have our seed, all the way down to slice 145 with the left lung. And I say run. You can see this filling up in here on the transverse slice.
And that looks pretty good. All right, I'm going to stop that, and I'm going to show you that we can also select the right lung. And I'm going to do the same thing here. And I'm just stopping because on the next data set, these are already done. So just saving time for our discussion here.
So what I typically like to do is go all the way down to the base and then go the other direction all the way up to the apex. And you'll notice that we start-- well, we started on slice 256 because it's just easier to see what's going on instead of just starting at the beginning. Plus, some of these algorithms, like active contours, are biased. They work better if they're biased towards growing or shrinking. So it's just a convenience.
So let's move on to the second data set that should be prelabeled. And we have this now fully labeled lung set. And from that, I can look at my 3D volume. And by the way, I can modify that volume the way that it's rendered.
I can change to different rendering options like CT bone, linear grayscale, CT soft tissue, and I can even edit that as much as I want. And I can start playing around with that and just get a custom visualization. And if I want to do that, I'm going to go back to my linear grayscale and just say, let's do something like this maybe.
OK, so there's my volume. So, OK, let's close that rendering editor. I think it looks good. And when I have that, the next thing I want to do is if I want to analyze is to export that, and I can export the ground truth to a file. And I don't really need to save this at the moment, but you can save it wherever you want.
And what I'm going to do now is I'm going to go to the third unlabeled data set because I want to introduce the next tool called MONAI Label. And if I, I mentioned it earlier, MONAI Label is a really cool, just hands-off way of labeling.
So I'm going to select MONAI Label, and I'm going to start the algorithm on my local machine. And the first time you do this, it takes a moment to load. You'll have to import it from a support package. Subsequent times, it takes maybe 15, 20 seconds, something like that. Pretty quick anyway.
OK, so I've got my MONAI Label loaded up, and there are several MONAI label models. So I can come along and select the one I select the one I want. And if I'm looking for vertebrae or spine or spleen or whole body, I think what we want is probably just the segmentation algorithm pretrained for CT scans.
And then I'm prompted with this panel. Select the labels that you want, and we're only interested in lobes of the lung. So I'm going to select these five different lobes. And if I wanted to, by the way, I could map those to right lung or left lung or create new variables from them. I'm just going to create new variables from them. And it'll say, OK. And with my hands off, I'm just going to say run. And then MONAI Label is going to do all the work for me. OK. So again, hands off, this is fully automated.
And in about 30 to 40 seconds like that, I have my fully labeled data set with all the different lobes of the lungs labeled. So if I want next to do some analysis, of course, the next thing I want to do is go back to my Labeler tab, Export to Ground Truth. And I'll just say Ground Truth Med Temp, for example. And export it. And now I can close this environment.
OK, so now I'm going to-- my Ground Truth exported. I'm just going to go load again from the Ground Truth Gold. I mentioned that as we load from NIfTI or DICOM, if we have the metadata we automatically convert to hounsfield. I didn't mention that we also have the voxel spacing, so I know the voxel spacing in millimeters, and I'm going to load in the three voxel directions.
So I'm going to load and then multiply it by 10 to the negative 6 to convert from cubic millimeters to liters. And we can see pretty quickly that we have one volume of 6.14 liters. And that the normal capacities are typically in the range of 4 to 6l liters. So it seems fairly reasonable. OK. So that's it for demo number 1.
Now let's turn our attention to radiomics. Now, I'm going to preface this conversation by saying that we're pretty excited about this topic. And the reason is we've helped too many customers over the years to characterize regions segmented in their imagery by selecting some subset of region properties that characterize those regions and then using those properties to build some kind of predictive model.
And every time we do that, the process is somewhat laborious. We have to figure out which properties make sense to use. But more importantly, it's, quite frankly, somewhat subjective. And every time we do this process, we might select different features.
Radiomics takes all of that subjectivity out of the equation. And with a single call to a radiomics function, we can compute up to 550 features that are compliant with IBSI standards. That is, shape, intensity and texture features that characterize each of these blobs in our image.
And once we have our feature segmented, we have functionality with which we can eliminate redundant information. Any features that are internally similar, we can discard. We can also find which information maps well and is predictive of the decisions we want to make. So we compare our data very efficiently. And once we have these data paired, we can then build a model, some kind of predictive machine learning model, with which we can infer and make our characterizations of our data.
So the radiomics workflow typically looks like this. Normally, we would bring our data into a medical volume object. We would do any kind of preprocessing that we want to do-- this background removal, filtering, registration, denoising.
We would use the Medical image Labeler to identify or to segment the regions of interest in those images. And once we have those data segmented, we would then prepare them for use in the radiomics workflow. Automatically compute shape, texture, and intensity features, pair our data and then build our model.
So for our demo today, we have a data set that is presegmented. We have ultrasound breast images and tumors that are identified, and we're going to start our demo by preparing those data for use in the radiomics workflow.
So let's go to MATLAB and see what this looks like. So here we are in MATLAB, and I'm going to access images in the breast ultrasound images data set. This is about 200 megabytes worth of imagery that has been reviewed by clinical radiologists. These radiologists have gone through and segmented tumors in those images and labeled them as either benign or malignant.
So to start, as usual, I'm going to clean up my workspace. I'm not going to train or tune any models live. I'm going to show you how to do that, but it takes too long to show it live.
As I mentioned, there are different ways of pairing the data. For our demo, we're going to pair in two ways-- we're going to select data that are predictive of malignancy or benignness. That is, they correlate well with the decision that we want to make. And we're going to discard anything that is internally redundant.
Now, I can also tell MATLAB what kind of features I want to calculate. In this case, I'm going to calculate all of them-- shape, intensity and texture. And then I'm going to download my data set. If this is the first time you're doing this, you'll be prompted to download and unzip those files. And then we'll prepare the data.
To do that, I'm going to create a data store. And since some of those data are normal-- they don't have tumors-- we're going to discard those from our model. Similarly, we discard the masks that come with those, the segmentation masks that come with those, and we remove unused labels. So we end up with just benign or malignant.
So let's look what a couple of these samples images look like. On the left here, you see an image with a tumor in it. And here on the right, you see the segmentation of the tumor as benign. And here on the bottom is another tumor. And this one is labeled as malignant.
So let's create our test data and our training data. Normally, when we create a machine learning model, we don't want to use all of our data to train. We want to hold out some for testing. For this purpose today, I'm going to use a cvpartition function. And that's going to allow me to break up my data with 30% of my data going for testing and 70% for training. So after I run this, I have 453 training images and 194 test images spanning both of those classes, malignant or benign.
So we want to create our radiomics data. So we have to prepare this data for use in the radiomics workflow. We're going to do that by creating a table of those data. If I were training live, I would then load in my data one by one, convert to grayscale, cast into a medical volume, prepare them, and then calculate the shape properties across those data.
And it's very simple. I just say radiomics of my data and pass it in. So in this case, I'm not going to train that live again because it takes too long. So having saved this previously, I'm simply going to load up that presaved data. So in just a matter of a few minutes, I have 208 features I've calculated across all the tumors and all of those images.
So here's where we're going to pare out our data. I wrote this as a function called pareSelection. And I'll leave it to you to study this, but I just calculated the correlation between the columns and the prediction of malignancy and benignness as we the ground truth of those, and I've thrown away anything that's internally redundant.
So when I'm done with this, I started with 208 features. There are 29 features left after selecting only the ones that are predictive of malignancy. And then 18 features left after throwing away redundant information. So this is a much smaller subset of our features, but they're the ones that have been automatically selected.
So if I wanted to, I can display the names of the features that we're using. So we started with 208, and we're now down to these 18. And here I'm just going to visualize what these features look like.
So here on the left is our classification of malignancy and benignness, and these are the 18 features that we use to characterize them. Some of them, you can see the correlations. So what we'd like to do next is to create their deep learning model.
And for our purposes, I'm going to use a fitcauto. This is an automatic selector of a classification model, automatically tuning with optimized hyperparameters. If I weren't going to tune this model, I would run it through the fitc auto process, and it would iteratively go through several models that would pick the best one for me. And again, I presave this, so I'm just going to load up the presave model.
So now I come along, and I can use my model to predict classifications of my test set, and I can calculate the accuracy of my model using a confusion chart. And then here we can see that we've got 97.5 accuracy just using those 18 features. So that seems pretty good to me.
So let's see how long it takes to read, prepare, and then calculate radiomics features on a single data set. We see that in just about a second, we calculated this. Here we see an image that is actually ground truth to be benign, and we predicted it to be benign. So that looks pretty good.
OK. So when we look at our confusion matrix, we have three tumors that were falsely predicted to be benign, when they're actually malignant. These are false negatives. We want to be very careful about sending someone home who might have cancer.
We might want to change the weighting of this calculation so they have less likelihood of creating these false negatives. So I can come along, for example, and I can change the weighting. The default weighting is 0101, but I can weight the false negative value much higher. And then again, just a lower likelihood of getting that false positive there.
And finally, if I wanted to, I can just visualize the ones that I got wrong. So these two are the ones that are malignant that we predicted to be benign. And these handful here are the ones that are benign that we predicted to be malignant.
Next, we turn our attention to answering the question-- how do we process images that are too big to fit in your computer's memory? Using blocked image processing, we can parse arbitrarily large images as collections of smaller blocks that we can then load, visualize, and process individually.
To do this, we create a pyramid of our data with levels ranging from full resolution all the way down to thumbnail size. And whatever calculations we need to make, we perform on the level that makes sense for that particular operation. For instance, if we wanted to mask the image to indicate which regions of a large image we want to process, it makes sense to create that interest mask at a fairly low level. MATLAB will maintain for us the correspondence between these levels.
Here, for instance, we've masked a low-resolution version of our big image, indicating which areas are of interest and which are not. When we then process the image at full resolution, we can readily skip masked or even partially masked blocks.
So we're going to spend a few minutes talking about how to use blocked image functionality, but there's a second aspect to this discussion. That is, what exactly do we want to calculate in each block? This could be almost anything. You may, for instance, want to detect tumors in a pathology image or to count labeled markers in a fluorescence imaging workflow.
For our purposes, we're going to try to detect, segment, and count nuclei in the non masked portion of a whole slide image. Detecting and counting objects can, in general, be exceptionally difficult when objects are hard to detect or contiguous with one another. We know that deep learning can make challenging image processing problems tractable.
In fact, the Cellpose deep learning model introduced in R2023B can make short work of counting cells even across block boundaries. Cellpose is a single class instance segmentation algorithm, meaning that it can label many objects of one type. For example, Cellpose can detect hundreds of blood cells in an image, but it can't differentiate between red blood cells and white blood cells. But recall that we've seen previously that segmentation can be the first step to characterizing or identifying regions of interest.
So let's go one more time to MATLAB to answer these questions. So as usual, we start with a clean slate and indications that we're not using live processing. Before we get into the blockwise analysis, let's spend a few minutes discussing how to use blocked image. We start by reading in a very large breast tumor image as a blocked image.
We can see that we have nine levels, ranging in size from 13 gigabytes all the way down to less than a megabyte. The first thing we might want to do is to visualize the image. Here we use bigimageshow instead of Iamshow. Notice how the resolution of the display changes automatically as we zoom in.
We can manipulate this big image in several ways. Here we visualize a small region by constraining the x and y limits of the display. We can then readily extract the visualized region using the get region method.
We can specify our subimage limits interactively using draw rectangle, for example, or programmatically. Either way, MATLAB will keep track of the associations between layers for us.
So now that we have a sense of how to manipulate a blocked image, let's move on to counting cells. First, let's try to call color thresholder operating on the subimage we created above. We can select the color space. In fact, probably any of these will work. Since we're interested in the dark regions, we can select the dark region in this image or in the color map here.
We can quickly see how challenging separating these blobs to get an accurate cell count will be. Traditionally, we would use a watershed segmentation approach, but that's rarely easy or particularly accurate. We might alternatively try to leverage the circular nature of the cells using circular hough transforms.
This, too, can be challenging. We can also try it in grayscale, using the image segmenter. But I can tell you the challenges are the same.
Let's give Cellpose a try. The Cellpose library shipped with several models. We're going to use the nuclei model with which we find bright objects in a grayscale image. So first we prepare our image for the model by converting to grayscale and complementing the original image.
Next we load the Cellpose model indicating whether we want to use the GPU or the CPU optimized model, and we provide an approximate diameter for the nuclei in the image. And then we call segment cells on our sampling subimage and visualize the results which look really amazing.
Before we process the whole slide image, we might want to try the algorithm on different regions of the whole image. The ExploreCellposeBlockedApply function provided here gives us a useful tool for exploring our image. So as we drag this little reticle around, we load up the image, and we automatically calculate the Cellpose segmentation of that region.
So it appears to work well across the whole image. And we're almost ready to use the model to process blocks in the image. But first, we might want to recognize that there are large areas of the image that we are not necessarily interested in. So let's return to the color threshold for a moment to create a mask of the regions of interest.
Once we've tuned it, we can easily export a function that creates the mask for us. Now, I've presaved create breast tissue mask using this exact workflow. And I've also passed in an optional minSize parameter that allows us to get rid of smaller regions using bwareaopen and then to fill in any holes.
So let's call up create brush tissue mask and we want to get rid of anything that's 500 pixels or smaller. And we very quickly have a mask of the regions of interest in the whole slide image. Remember that we calculated that on the coarsest level of our pyramid and we can visualize that mask in a couple of different equivalent ways.
To maintain the world coordinate mappings, we can either manually specify the world's start and stop coordinates, or we can use the apply method. Both give equivalent results. Either way, we can then use select block locations to select only true masked regions.
The inclusion threshold parameter allows us to specify the minimum number of in-masked pixels that trigger inclusion in the processing. An inclusion threshold of zero, for instance, tells MATLAB to process the block if it contains at least one pixel within the mask. To maintain uniform processing, we might want to normalize the image when we create the image statistics. Note that we need to re instantiate the model to accommodate different image sizes.
So having previously processed this at about 30 minutes, we can easily load the results of our analysis and create and display a heatmap of the density of nuclei across the image. Now, those results can be processed in any way you need. Here, for example, we create the statistics to create a histogram of nucleus areas.
So, for example, here we can see that the nuclei have an average area of about 250 square pixels. And finally, we can count the number of nuclei. We can see that the Cellpose is detected somewhere in the range of 800,000 nuclei in the whole slide image. And within a specified region, we can view centroids and bounding boxes on nuclei in a particular region.
So let's finish our discussion today by pointing out once again that there are several apps that extend the functionality of the tools we're working with. I encourage you to browse these apps in the dropdown menu of your MATLAB desktop. All these apps auto generate code, so they're great tools for interactively solving your image processing challenges.
Users do a lot of different things with our tools. In the medical space, for example, customers are using our tools to do 3D printing, radiomics, deep learning or, finite element analysis. Regardless of your task, you might want to share your code with your colleagues. There are many ways to operationalize your MATLAB code.
The MATLAB Compiler tools allow you to create standalone executables and web apps that you can share any way you like. Compiler-deployed apps run in a freely distributable MATLAB runtime environment and do not require a license in MATLAB to run.
Alternatively, you can automatically generate code to target CPUs like internal arm processors, or you can generate Cuda code to target NVIDIA GPUs. You can even generate code to target an FPGA.
Also, you can deploy your analysis through your web browser using MATLAB online, integrating with platforms like Jupyter and Databricks. And you can scale up your computations in the cloud to run in environments like AWS, Azure, or NVIDIA NGC.
When you're done creating your applications, you may need to verify and validate them, and to ensure that your deployed code matches your MATLAB code. We have tools that facilitate testing your code against your requirements, and you can even validate it to ensure that it meets IEC 62304 standards for incorporation into medical devices. I'm going to wrap up by steering you to a long list of relevant in-doc examples which you should be able to try out pretty easily.
So in conclusion, MATLAB supports your medical image processing tasks with great documentation and examples with environments that facilitate rapid algorithm development and with code generation and validation tools for deployment to your user base. And we're here to help with tech support-- application engineers that you can call on and free trials and evaluations. And if you need deeper dive assistance, we have training and consulting services to help you.
Finally, here are some user stories showing how some of our customers are using our tools. Beth Israel Deaconess improved the accuracy of their MRIs using our tools; and given imaging, developed the PillCam using MATLAB. Here are a few more user stories to wrap things up.
OK. So that's it for the day. Thank you for your attention. And now let's open up the floor to questions.